02 June 2009

PC Snood vs. Mac Snood

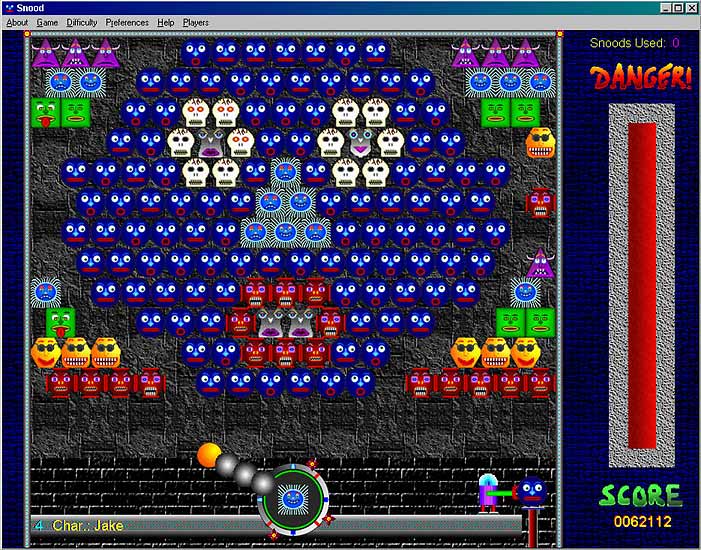
snood2

My mom, although she might not be aware of it, is a PC person and has always been one until I learned how to hackintosh. My ultimate dream actually was to get my dad to use computers and we've gone through some iterations of Windows: 98 (we're in a third world country so being dépassé tech-wise is pretty much the norm), Win Me, and finally, Win XP. However, my dad always would end up not using the computer at all.

Maybe having a decent net connection (at long last!) plays a huge part in the current situation but the Mac is also to be credited -- I mean the Hackintosh MSI Wind ;). I was surprised one day when, upon logging into yahoo messenger as I sipped my morning coffee at the office, I saw my dad was online! All on his own! So I popped him a message and he replied he was chatting with my uncle up north. What got him going is mainly the dock which I've customized especially for him, putting there all the apps he's fond of and knows how to use.

How do I teach using a computer to someone who doesn't like them very much, and by using OS X at that? It was quite easy - easier than I expected. One of the biggest surprise I'll mention here is about the fact that in OS X, closing a window (clicking on the red button marked x) doesn't close an app - well most of the time, that's the case - but that one has gotta quit the app. Being a windows person, I'd have to get through this learning curve and this little difference still gets to me sometimes. Now, my dad remembers to quit an app like it's second nature to him!

Last week, I reconfigured the MSI Wind to dual-boot again: WinXP and Mac OS X. When I was installing the usual anti-virus stuff, my mom, who usually hovers around whenever I use the computer, told me she wanted to play Snood. I told her she'd have to wait coz I'd have to download Snood again to reinstall (she's got Snood on her Mac OS X account). But when she asked me why I needed to download it again when it was supposed to be already installed, I didn't tell her it was because I reformatted the Wind and the Win XP part of it still isn't done being configured yet.

"I'm gonna download a newer version of Snood" was my reply. If she knew I reformatted the Wind and stuff, she'd go ballistic, worrying over her files, supposing me a person who doesn't back up her stuff. I could explain to her that everything's under control and that I'd put back everything on the Mac side just as they were but then she'll get the impression that I'm making the Wind an experiment workhorse for my "endless tinkering", so she'd probably stop using the machine, so I decided not to be totally honest with her.

With Snood installed on Win XP, my mom sat down to it and started playing. Ok, maybe I was totally wrong in calling her a PC person but the point is that she didn't realize she was on a different OS then and still thought the desktop looked weird just because she was logged into my account and she'd always thought I did weird stuff in my account anyway, like making OS X look Windows like.

Her impression?

"I don't like this 'new' version of Snood much. I prefer the feel of the older version when I play it." and by "older" version, she's referring to the one she used to play on OS X.

29 May 2009

Back to the Dark Ages


I'm back to dual-booting the MSI Wind - Mac OS X Leopard & Windows XP Professional. Though with an almost perfect setup (don't forget about the internal mic that still doesn't work what with VoodooHDA already installed), I've found out that there are things that only Windows XP can give me.

Mainly two things: (1) torrenting and (2) video streaming

Okay, there's a ton of fairly good torrent clients for Mac but based from experience, uTorrent is sluggish. I've changed to Transmission and then also, I've scourged the net high and low to research on speeding up the download speed. But the results only pointed to one thing: torrenting, or to be more specific, ways to speed up torrenting remain Windows-centric.

As for streaming; I'm a fan of asian drama's and youtube. What has always puzzled me is that I seem to always have "connection problems". I've been blaming it all on my broadband provider when all this time, it s simply because Flash has a notorious reputation in Mac OS X. Though only blessed with hackintoshes and not real Macs, I've become an OS X fan-girl in that I now know where my loyalties lie operating system-wise. So I even did what I could: update Safari, Firefox and install the lates Adobe Flash player, version 10 as of this writing. I even told myself that I was just too impatient by not letting the vid load first before hitting the play button, so I waited for the vid to fully load first but what do I get? Laggy video. Yep.

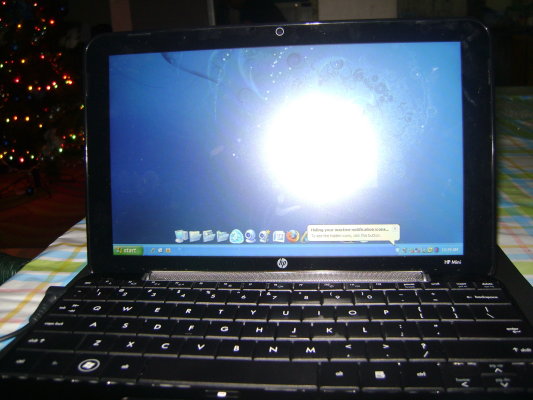
I first tried to install XP on my HP Mini since it didn't contain any important file of mine - it's currently my experiment workhorse - and plugged in the ethernet cable, fired up IE, installed Flash player went to my fave video streaming site and...

Epiphany. Succint enlightment.

I discovered that videos uploaded on streaming sites weren't cursed with a spell that I call "slow-motion-syndrome" -- not at all.

As for torrenting; I downloaded uTorrent and did some tweaking, fetched a torrent and left it downloading overnight. Guess what; the following morning when I woke up, the 1.5 GB file I wanted to DL was sitting there in my folder alright. It was done in just that span of time. Whereas back when I was torrenting in Mac OS X, uTorrent and Transmission alike, overnight would be equal to about 500 MB worth of downloaded data. And I was being graceful at that since I've rounded it up.

To make a long story with lots of boring installation parts short; I've made room for Win XP on the MSI Wind. For an OS that I've sworn to despise, I've given half of the Wind's hard disk real estate to it.

There was some snag on which I got caught while setting up my dual boot. I learned something new:

"chain0". Yep.

PC_EFI Chameleon v12 wouldn't boot up my Win XP installation so this was what I resorted to.

Click here for the details.

26 May 2009

Rekindle An Old Flame

I and MacBook Mini have been together now for three months and though there've been rough patches here and there, the relationship is rather going strong - with lots of reinstallation and hard disk wipe out in my attempts to get to know him; really and truly get to know his heart.

As a consequence, MacBook Wind has been left to gather dust and gunk especially (and literally) under its keyboard while it continues to sit on the work desk in the living. Aside from the VoodooHDA makeover it got, nothing else much has happened to him in the last few months. It's been on 10.5.6 for so long and now I think it's time to spend some quality time with MacBook wind.

Updating to 10.5.7 was a breeze. A quick trip to msiwind.net, bringing back goodies such as Cybergreg's Update Pack v1.5 in a baggie and taking care to move RealTek1000.kext from MacBook Wind's /System/Library/Extensions folder to a second partition, I was ready to run the Combo Updater for 10.5.7.

According the forums, the 10.5.7 would mean native support for the ethernet port on the Wind, so therefore no more need for the Realtek1000.kext. SoI tested that, without putting back the Realtek1000.kext, I tried to open up Safari and got an error message, telling me that I'm not connected to the internet. I even restarted several times after that just to make sure but apparently, my ethernet port wasn't working.

So, crossing my fingers that the Realtek1000 won't cause any video problems - i.e. getting stuck at a blue screen like what people have reported over at the forums - I reinstalled the Realtek1000 to its righteous place and restarted. I was dreading that the spinning wheel under that all too familiar by now squahsed grey Apple logo would suddenly freeze. But thankfully and to my utter relief, I was brought back to my desktop. Clicking on Safari on the dock opened up the Apple startup page this time.

What's different in 10.5.7? Though some have reported increased battery life for the Wind, I'd no chance to test since I'm using the Wind hooked up to an LCD monitor as a dekstop replacement, for when I wanna go mobile and still be connected, it's MacBook Mini that I lug around now.

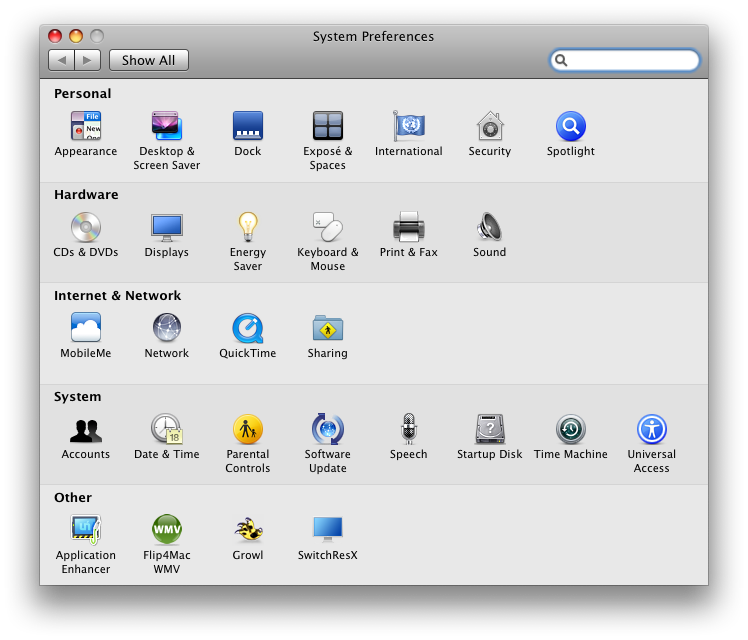
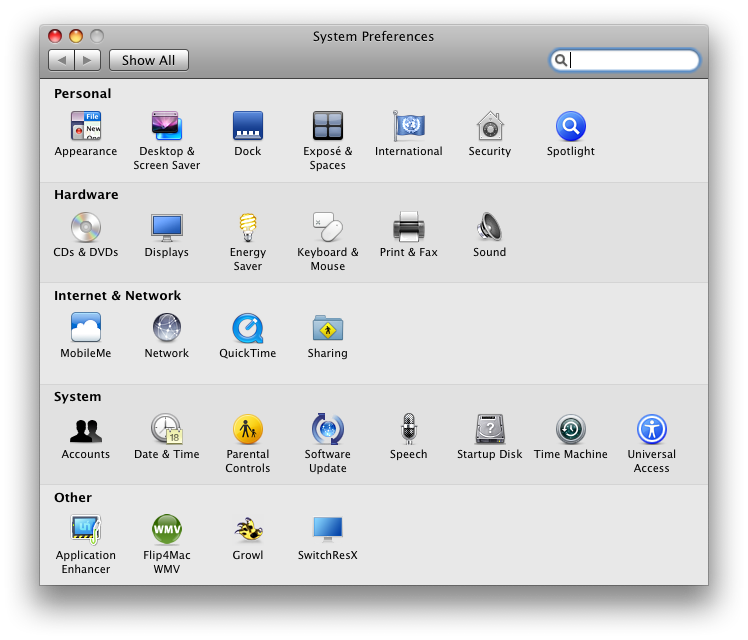
Perhaps that's because between me and MacBook Wind, there isn't any sparks anymore for me to notice anything else but that the System Preferences panel has undergone a minor change in 10.5.7;

10.5.6 SysPref-EnergySaver

Now, below, notive the new look of the Energy Saver prefpane. Twisted!


10.5.7 sys pref
That's just it I guess, no more way of rekindling an old flame. Period.

17 May 2009

I Hate Blogspot

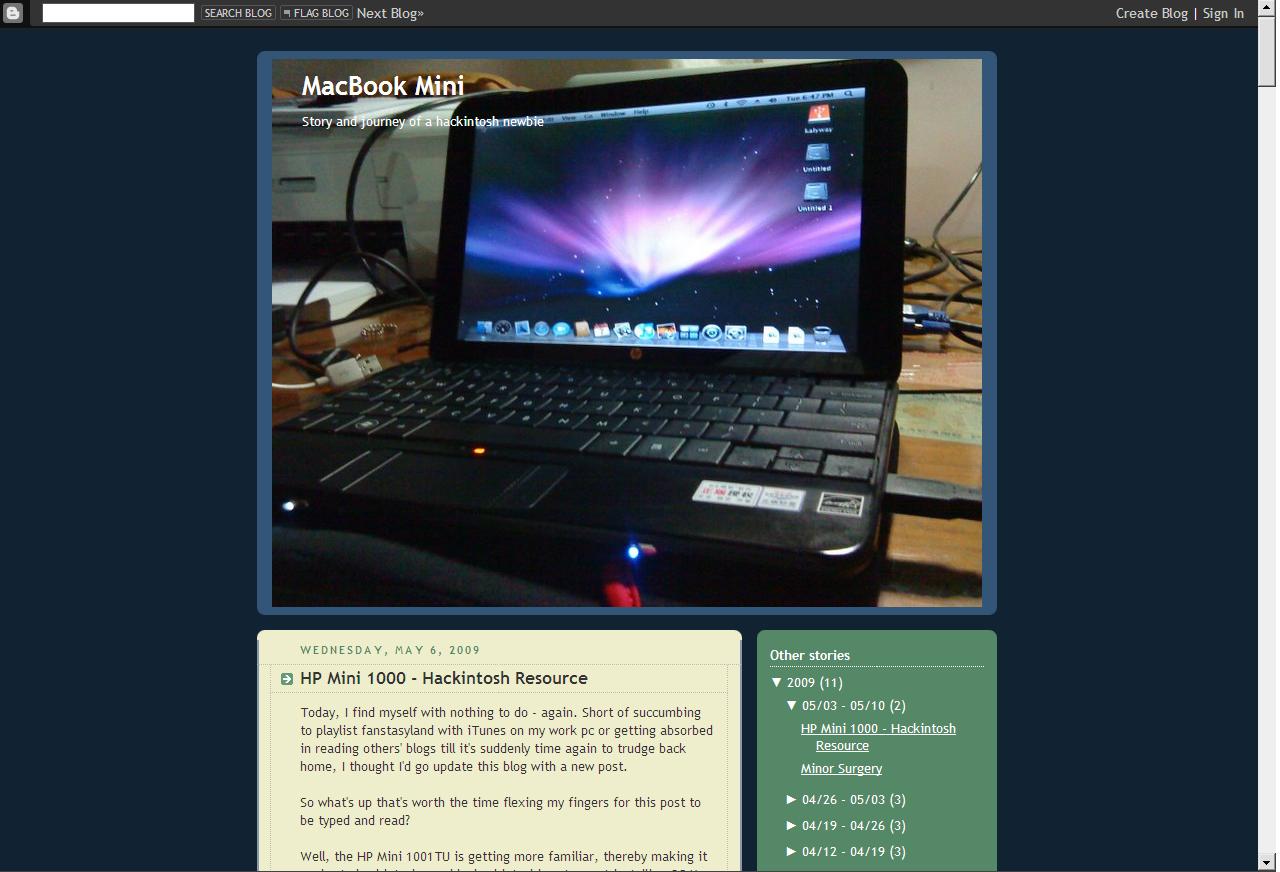
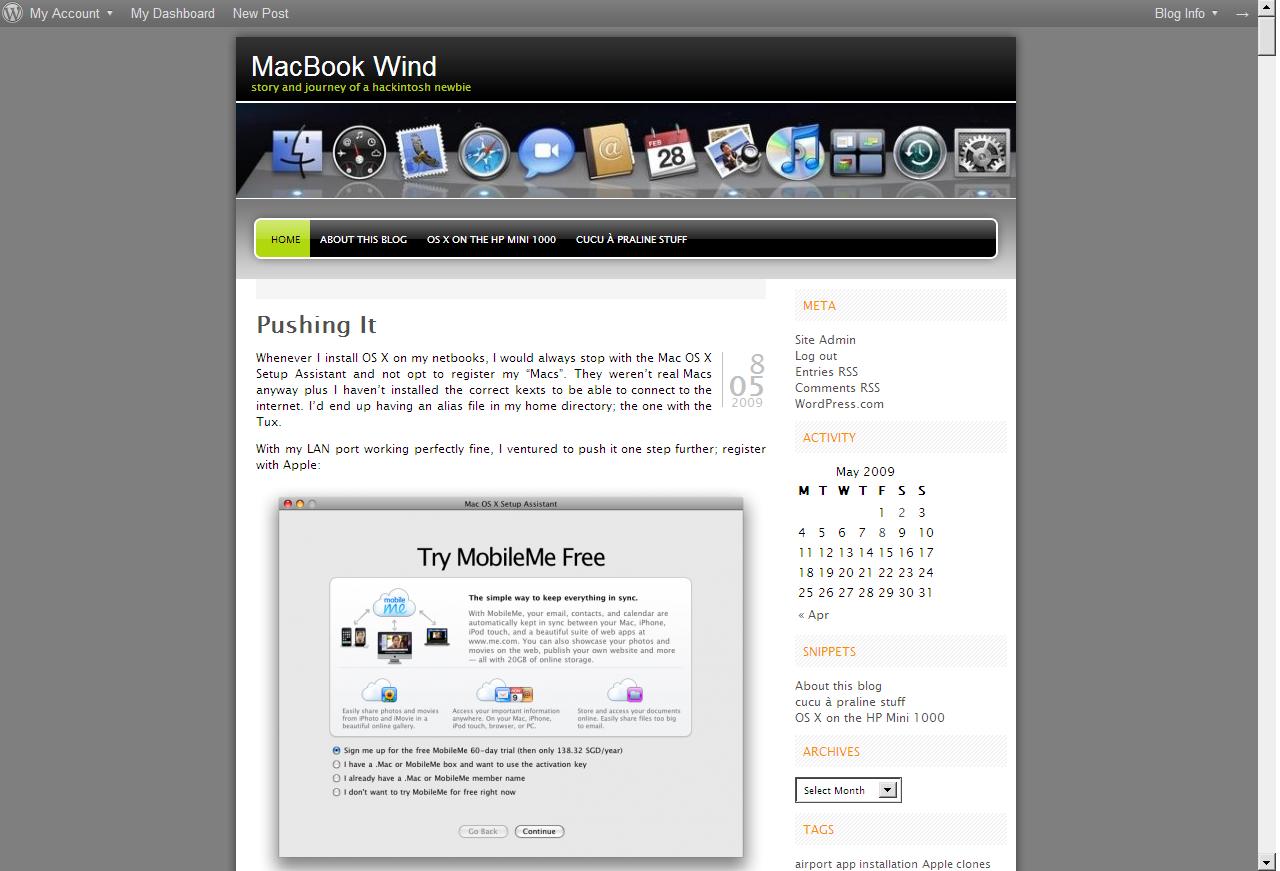
I hate blogspot. I don't hate blogspot perse - I just hate how it looks. I really love how macbookwind.wordpress.com looks and feels and no matter how I tweak macbookmini.blogspot.com, tried different themes, layout and such, it still sucks in comparison to my wordpress page. 

CSS you say? There was only one time that I actually mulled over the thought of learning CSS but decided not to in the end - didn't have to learn a single CSS code to get my wordpress page organized and up and running to my taste.

Why did I go with blogspot anyway? Google Adsense...but now that I think of it, it's just been all bad logic.

Oh well, you be the judge:

blogspot page

wordpress page

08 May 2009

Pushing It

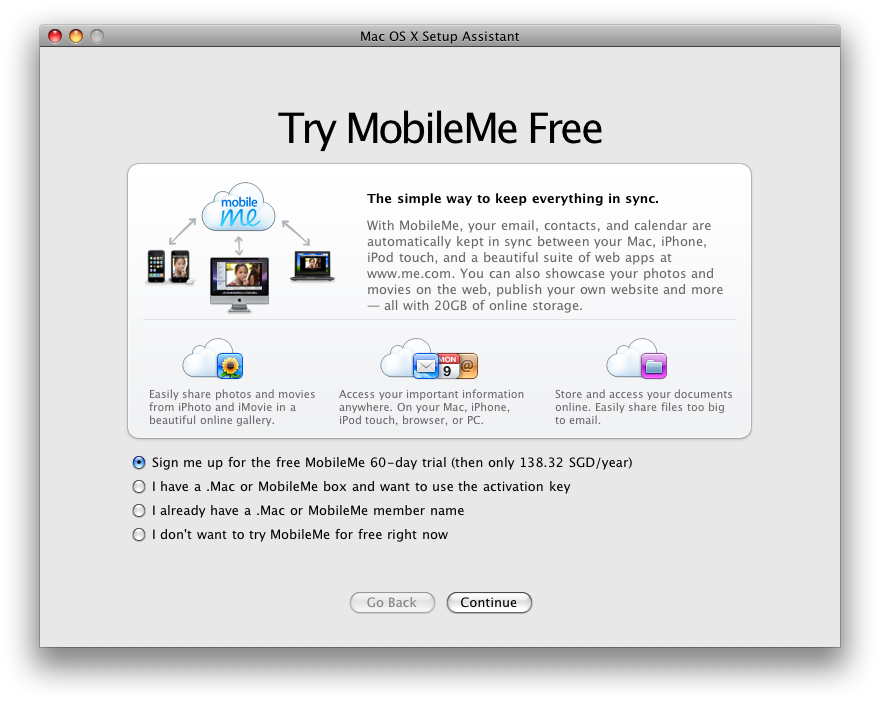
Whenever I install OS X on my netbooks, I would always stop with the Mac OS X Setup Assistant and not opt to register my "Macs". They weren't real Macs anyway plus I haven't installed the correct kexts to be able to connect to the internet. I'd end up having an alias file in my home directory; the one with the Tux.

With my LAN port working perfectly fine, I ventured to push it one step further; register with Apple:

Reg 1Of course I didn't sign up for Mobile Me trial.
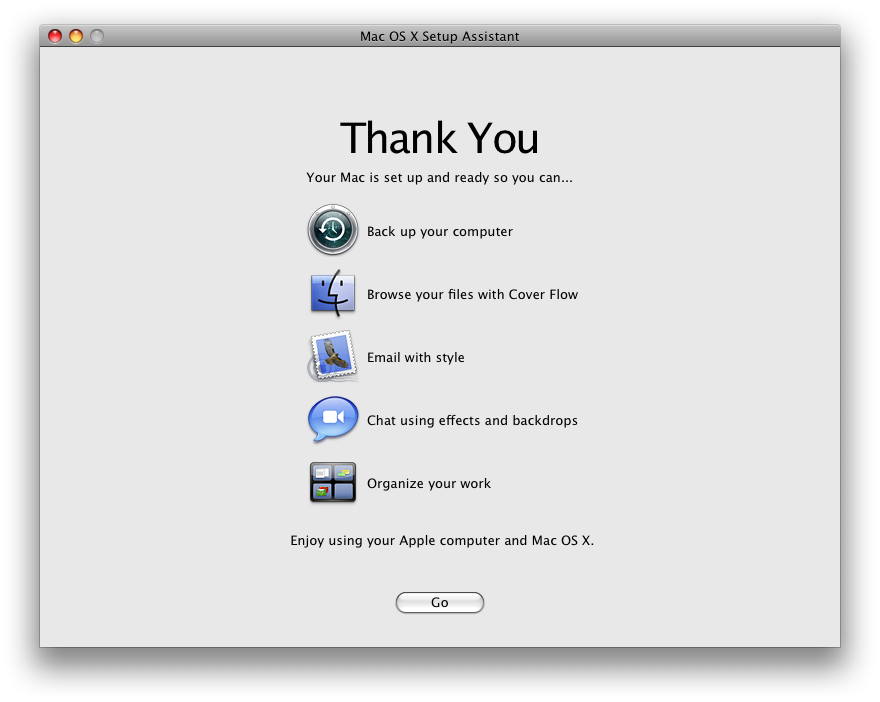
Reg 2I'll definitely enjoy using my Apple computer ;)
02 May 2009

Upping the Ante

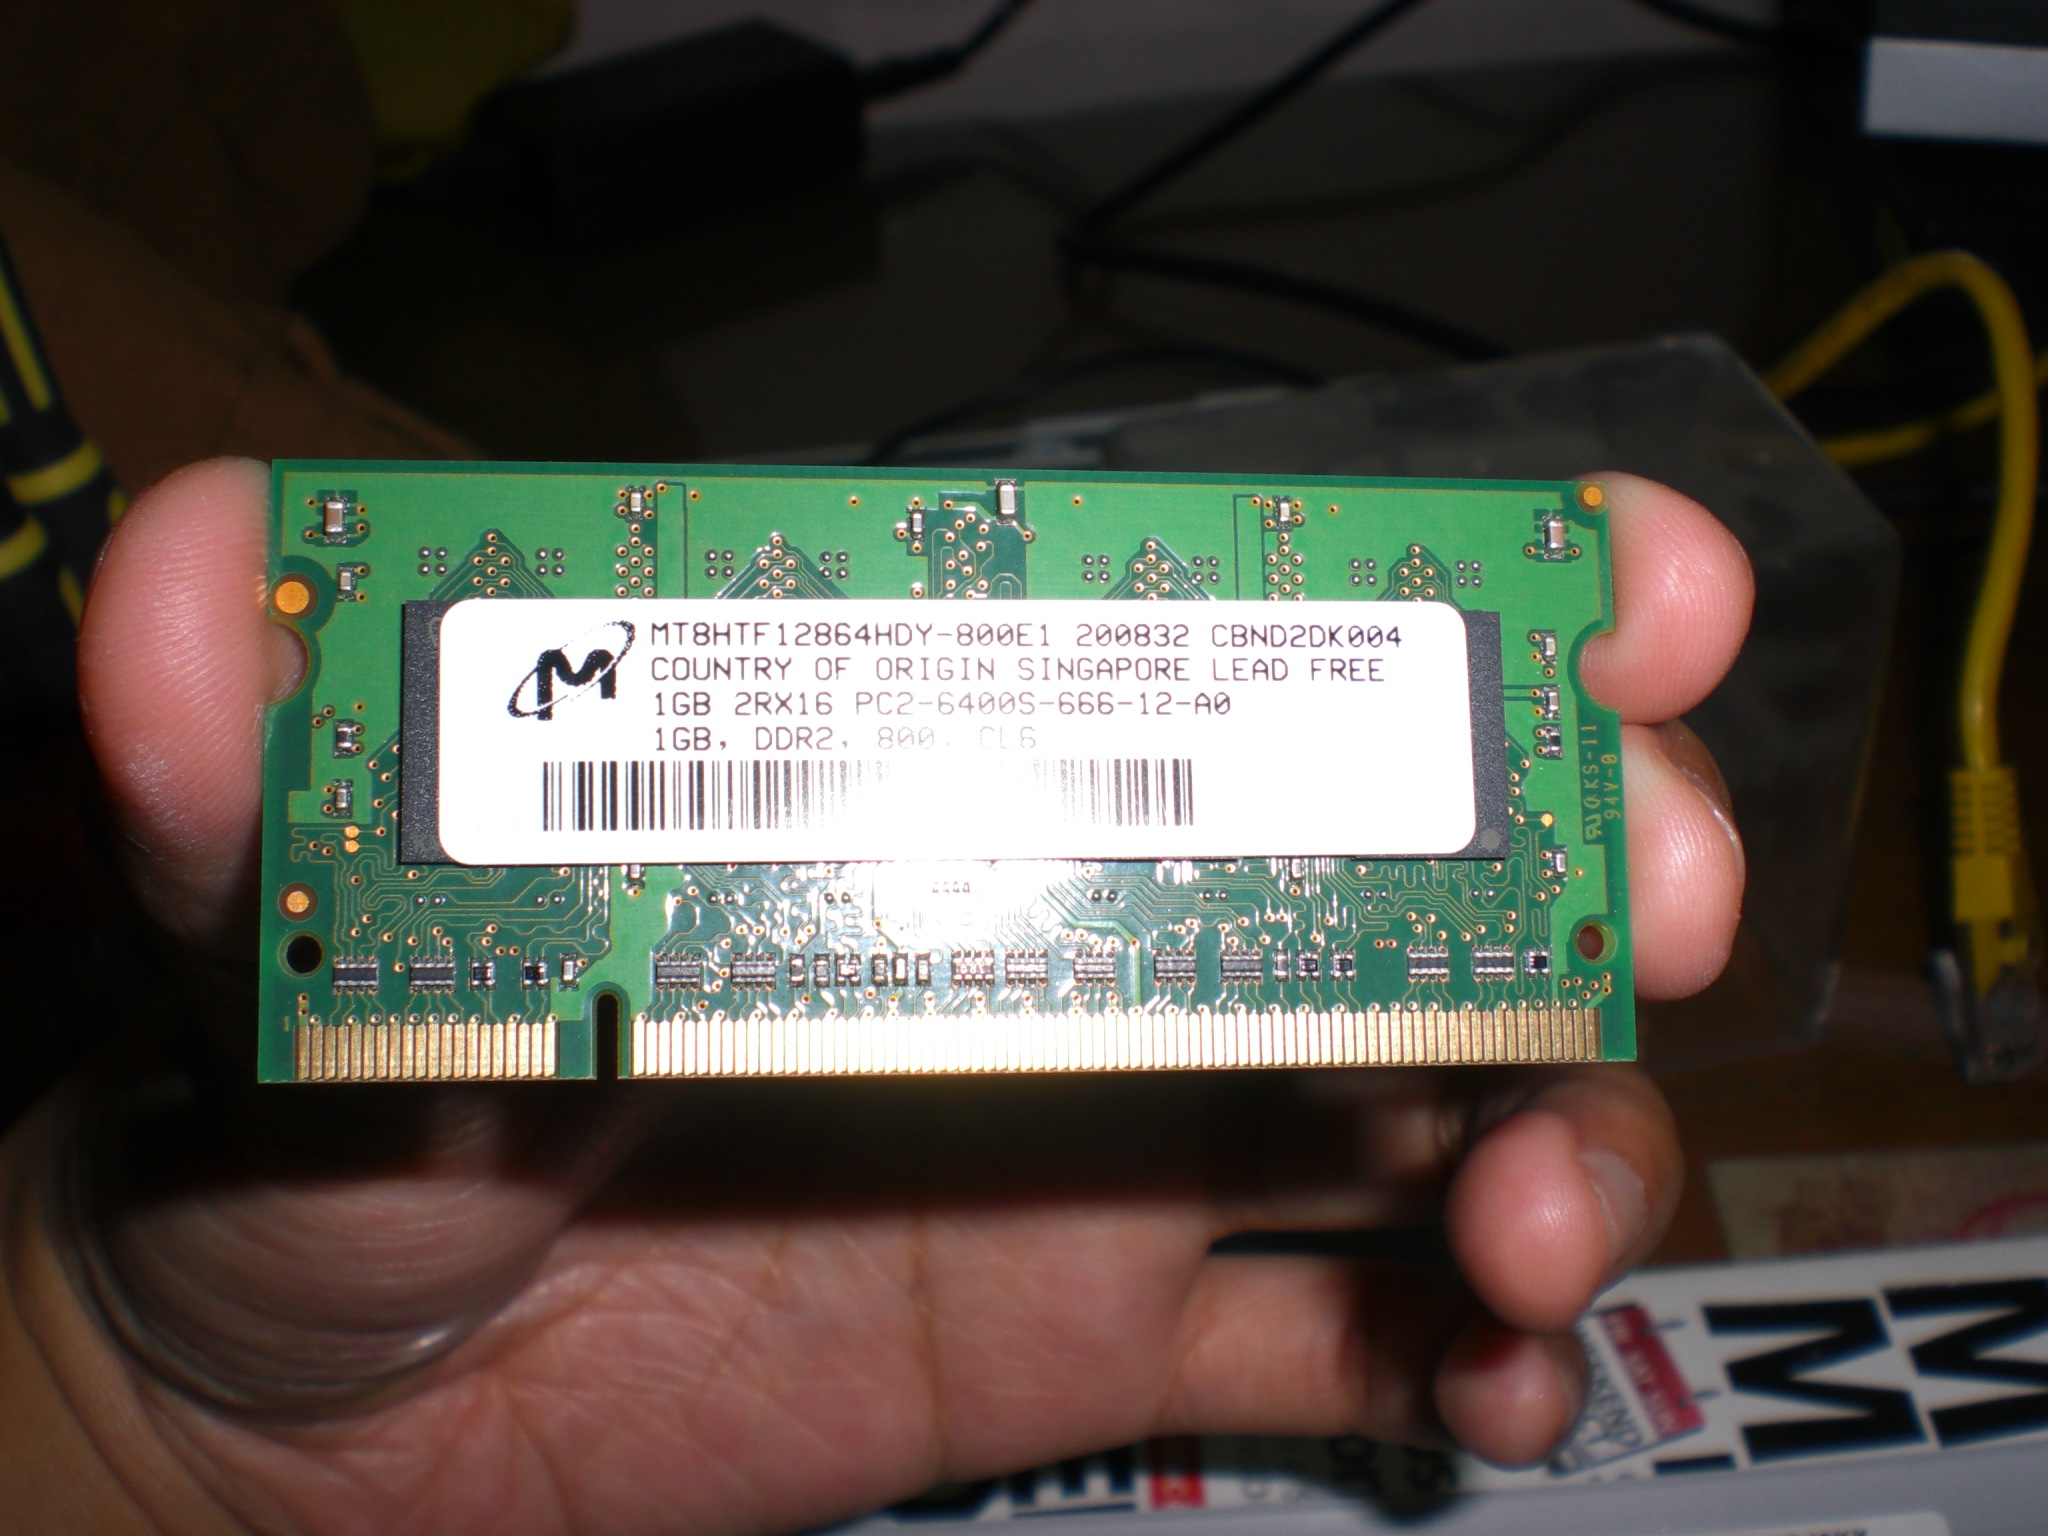
I just did what a broke person should not do: spend moolah when even her next payslip couldn't cover her bills as of date. But I had to give in to my inner geek and so after paying the internet connection bill, I ended up buying a 2 GB stick of DDR2 PC-667 RAM for my MacBook Mini. (Click here for that story)

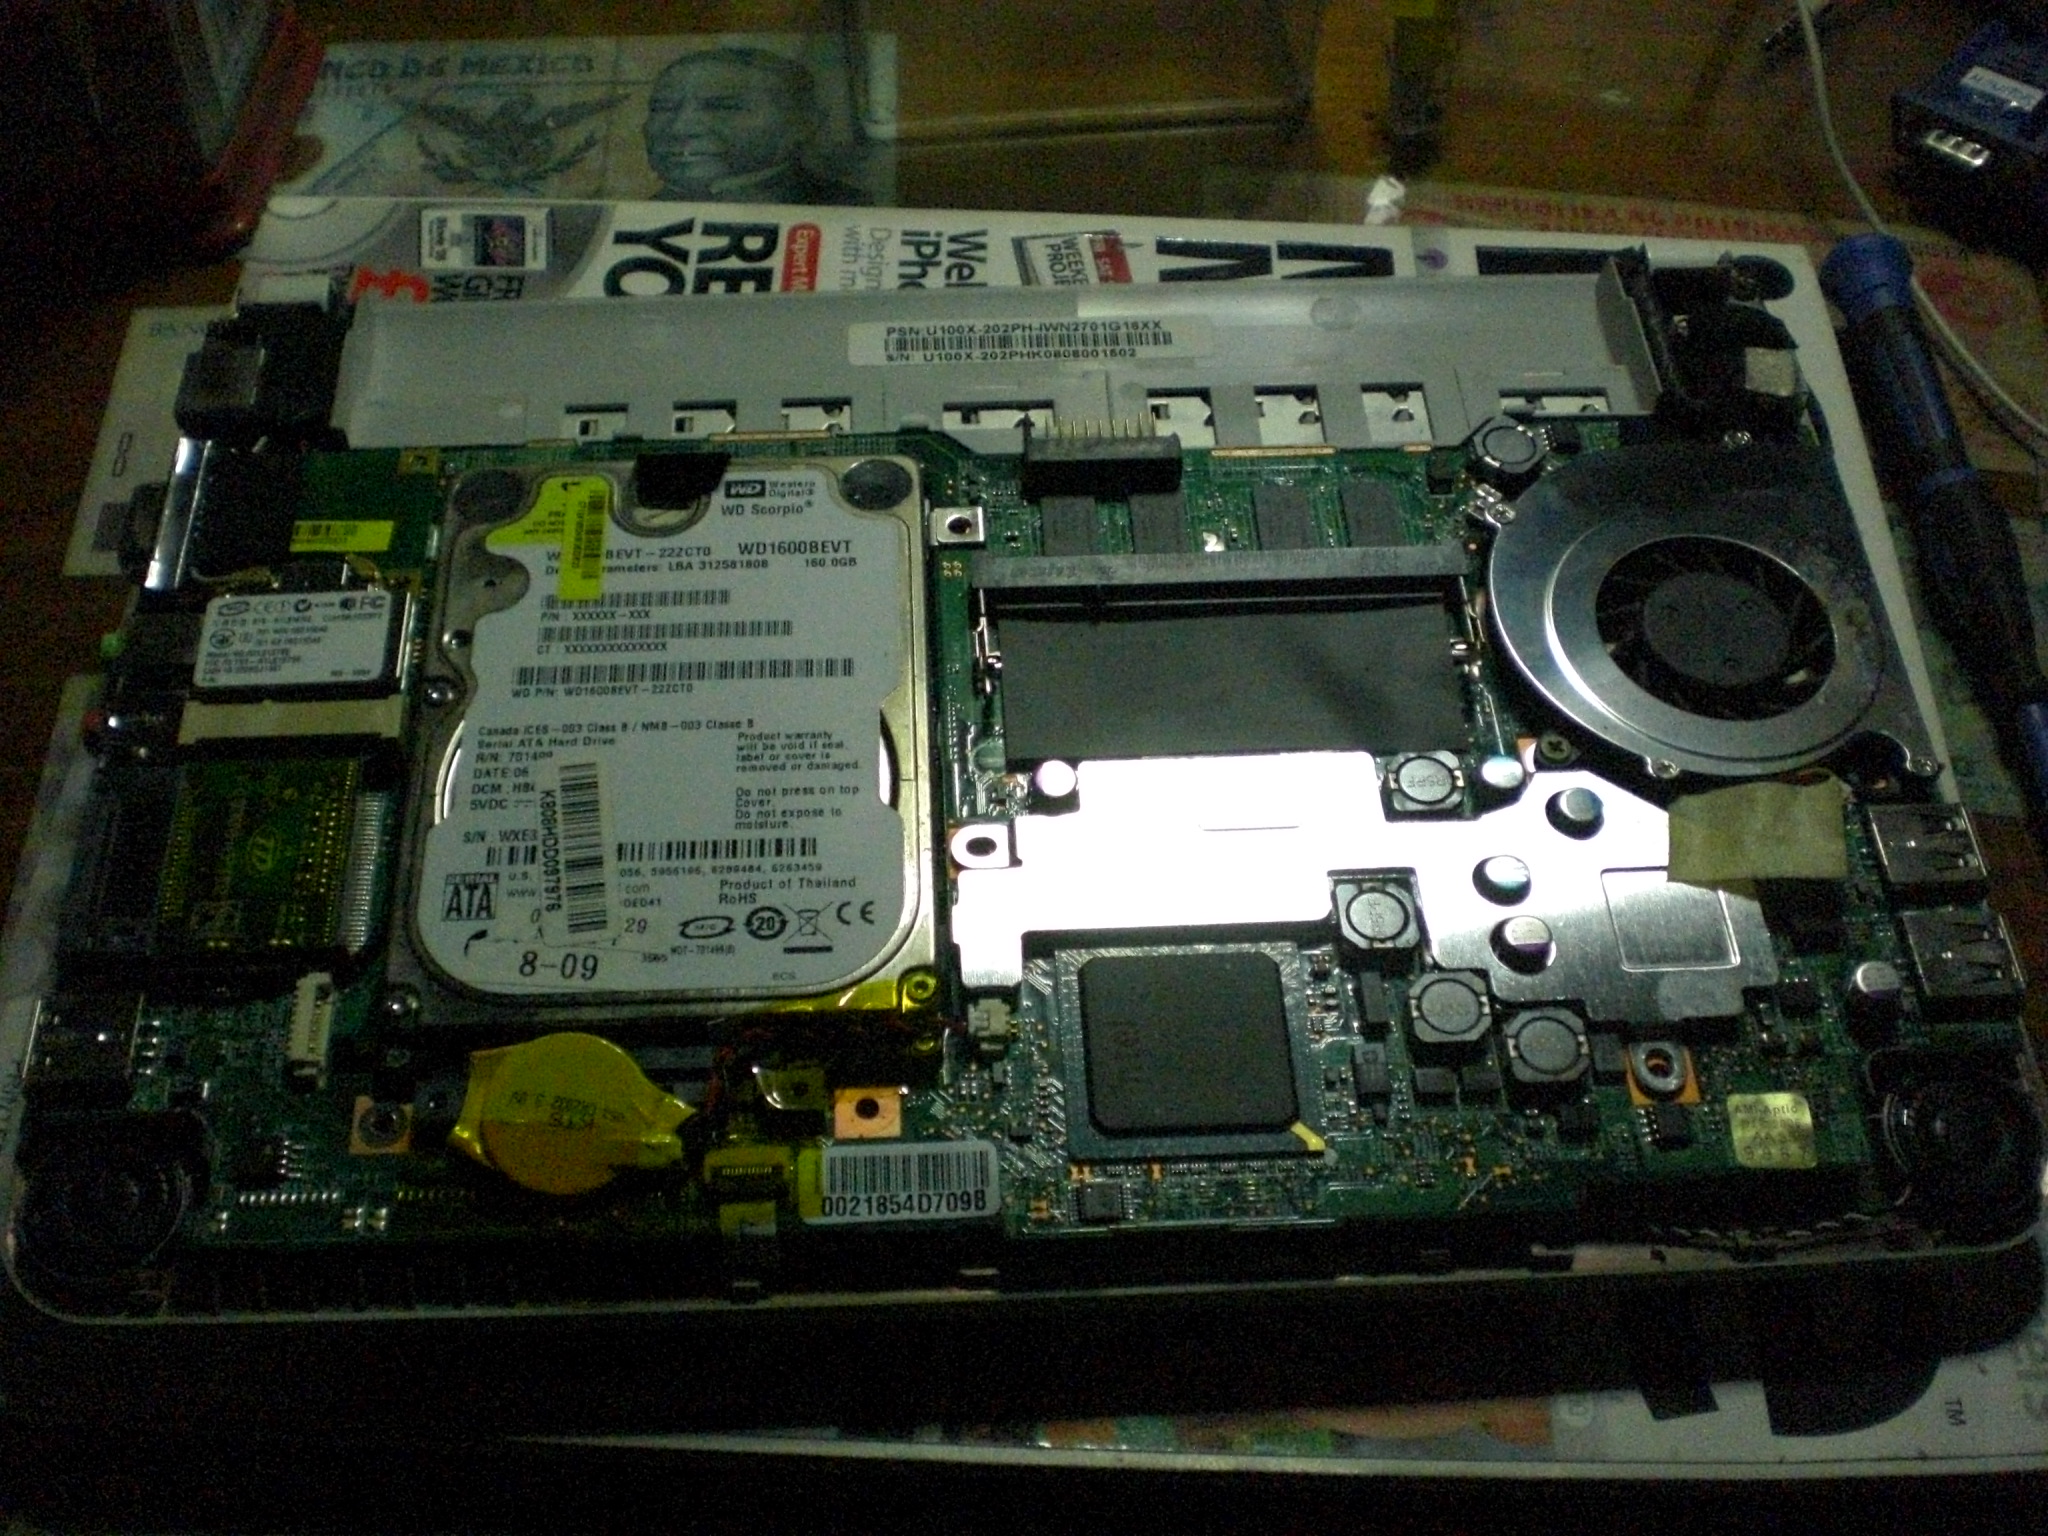
The HP mini 1000 only has one SO-DIMM slot which is occupied by default by a 1 GB stick. Upgrading the Mini meant having the pre-installed 1 GB RAM all to the MacBook Wind. So with a screw driver in hand, I turned over the Wind and proceeded with loosening all 9 screws. And yes, I ignored the "Warranty void if seal is broken" sticker.

Dislodging the backing of the chassis was the most difficult part; the side where most of the ports are - VGA, mic, audio jack - is fairly stuck. I had to loosen the opposite side first and the whole backing came off with about a couple of clicks.

cimg1817

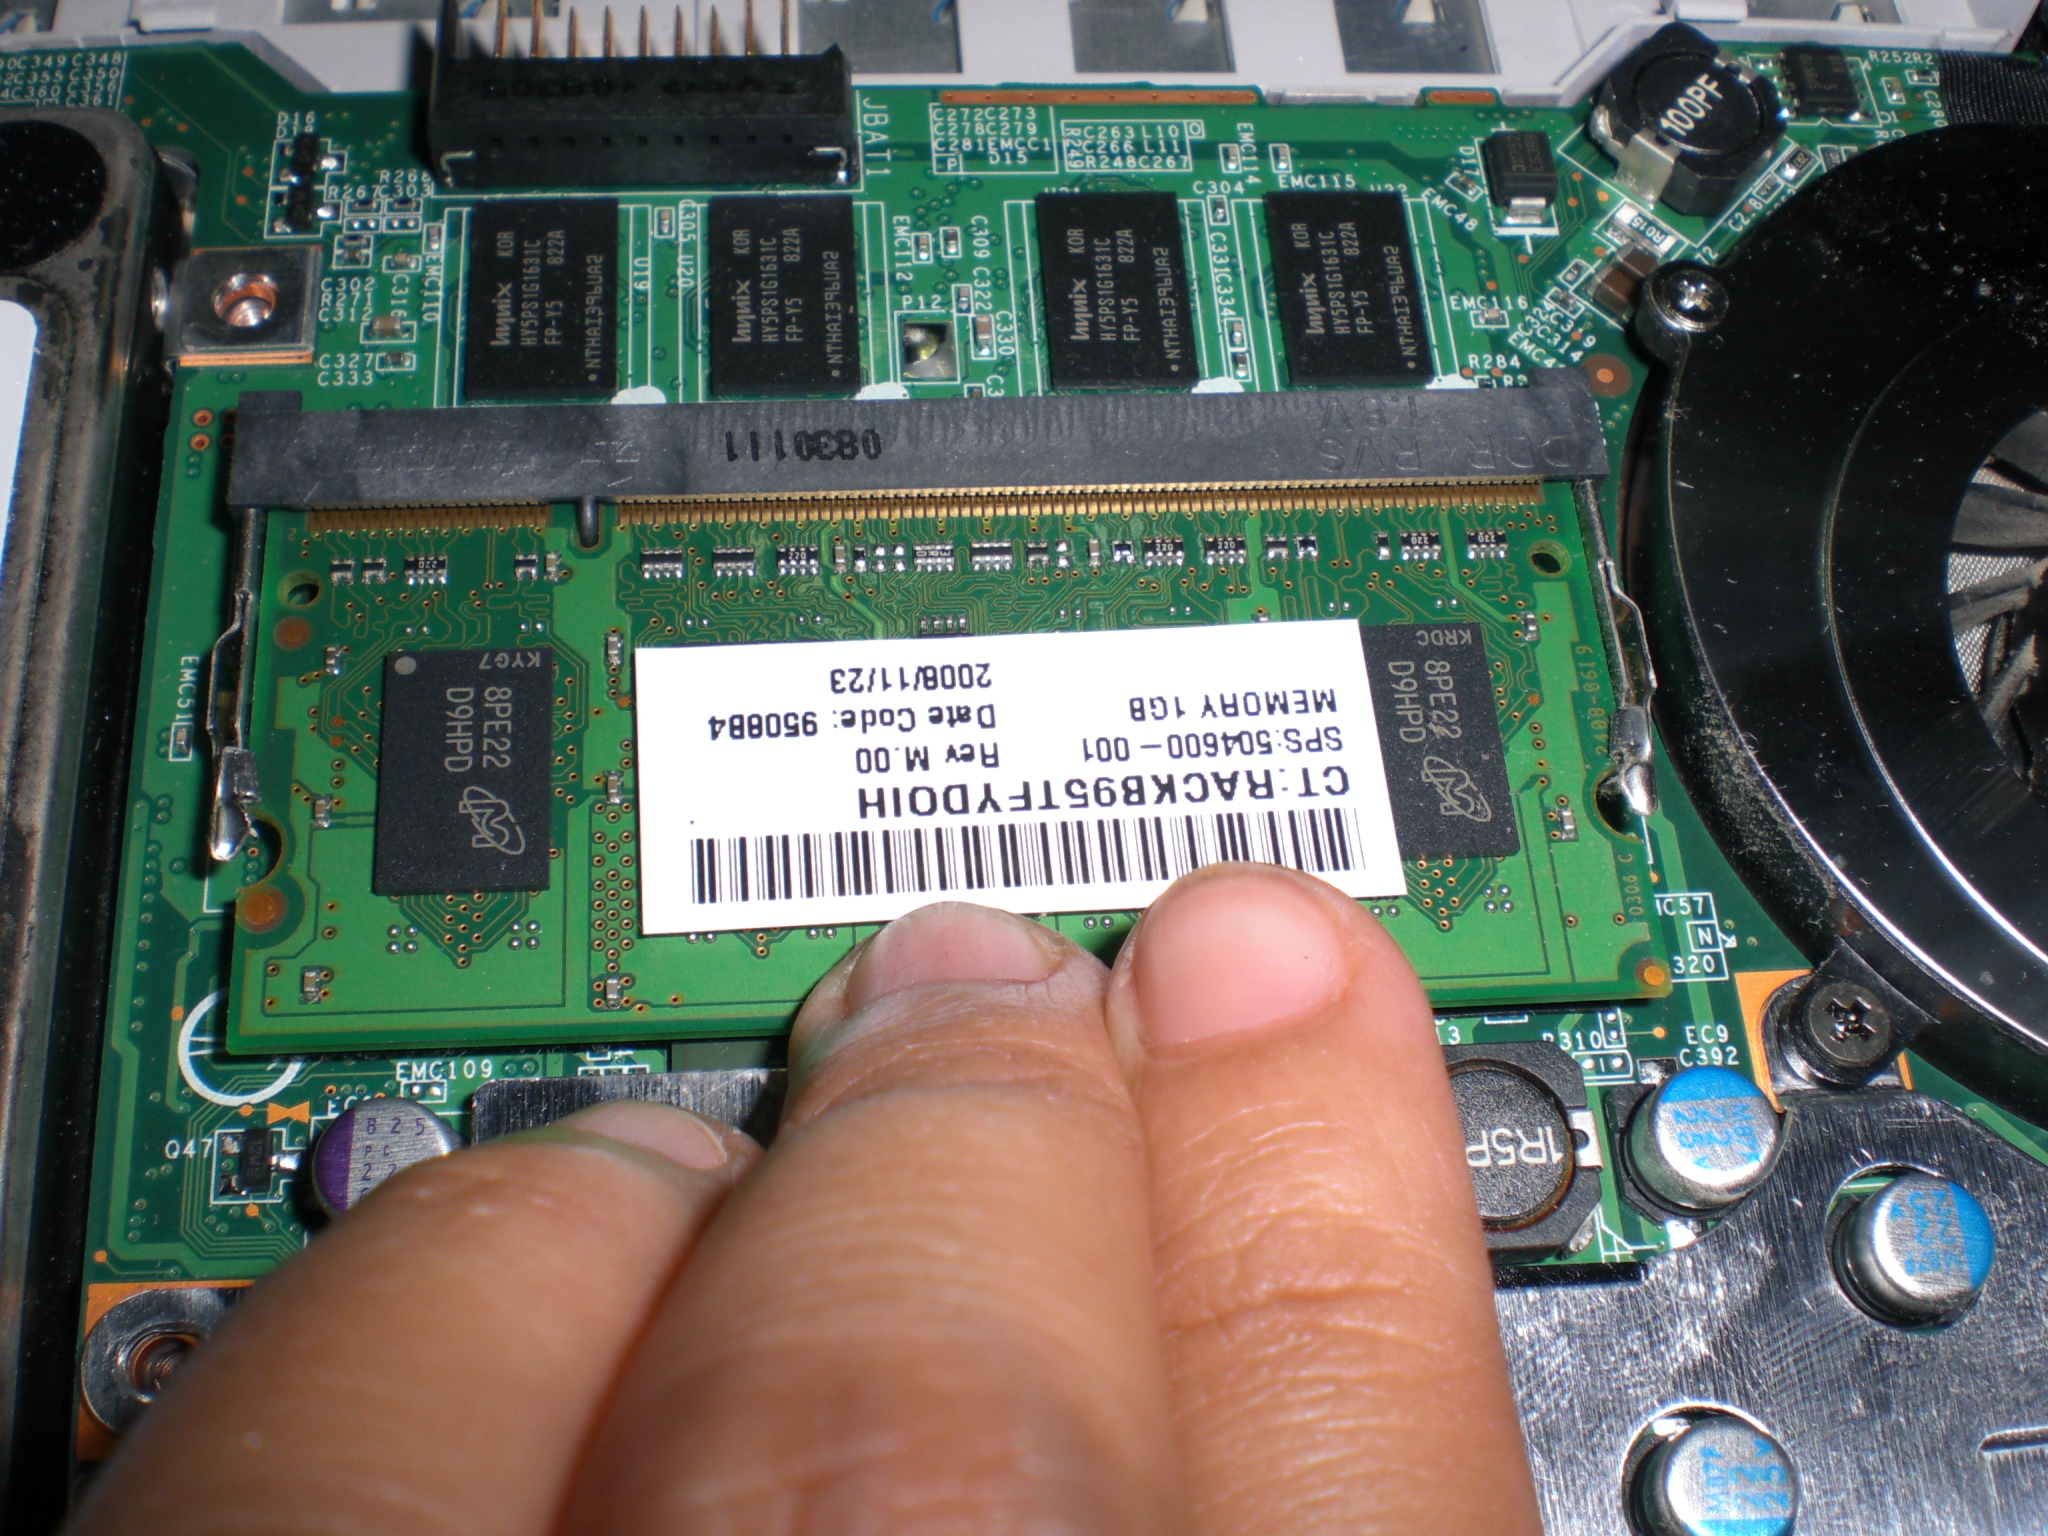
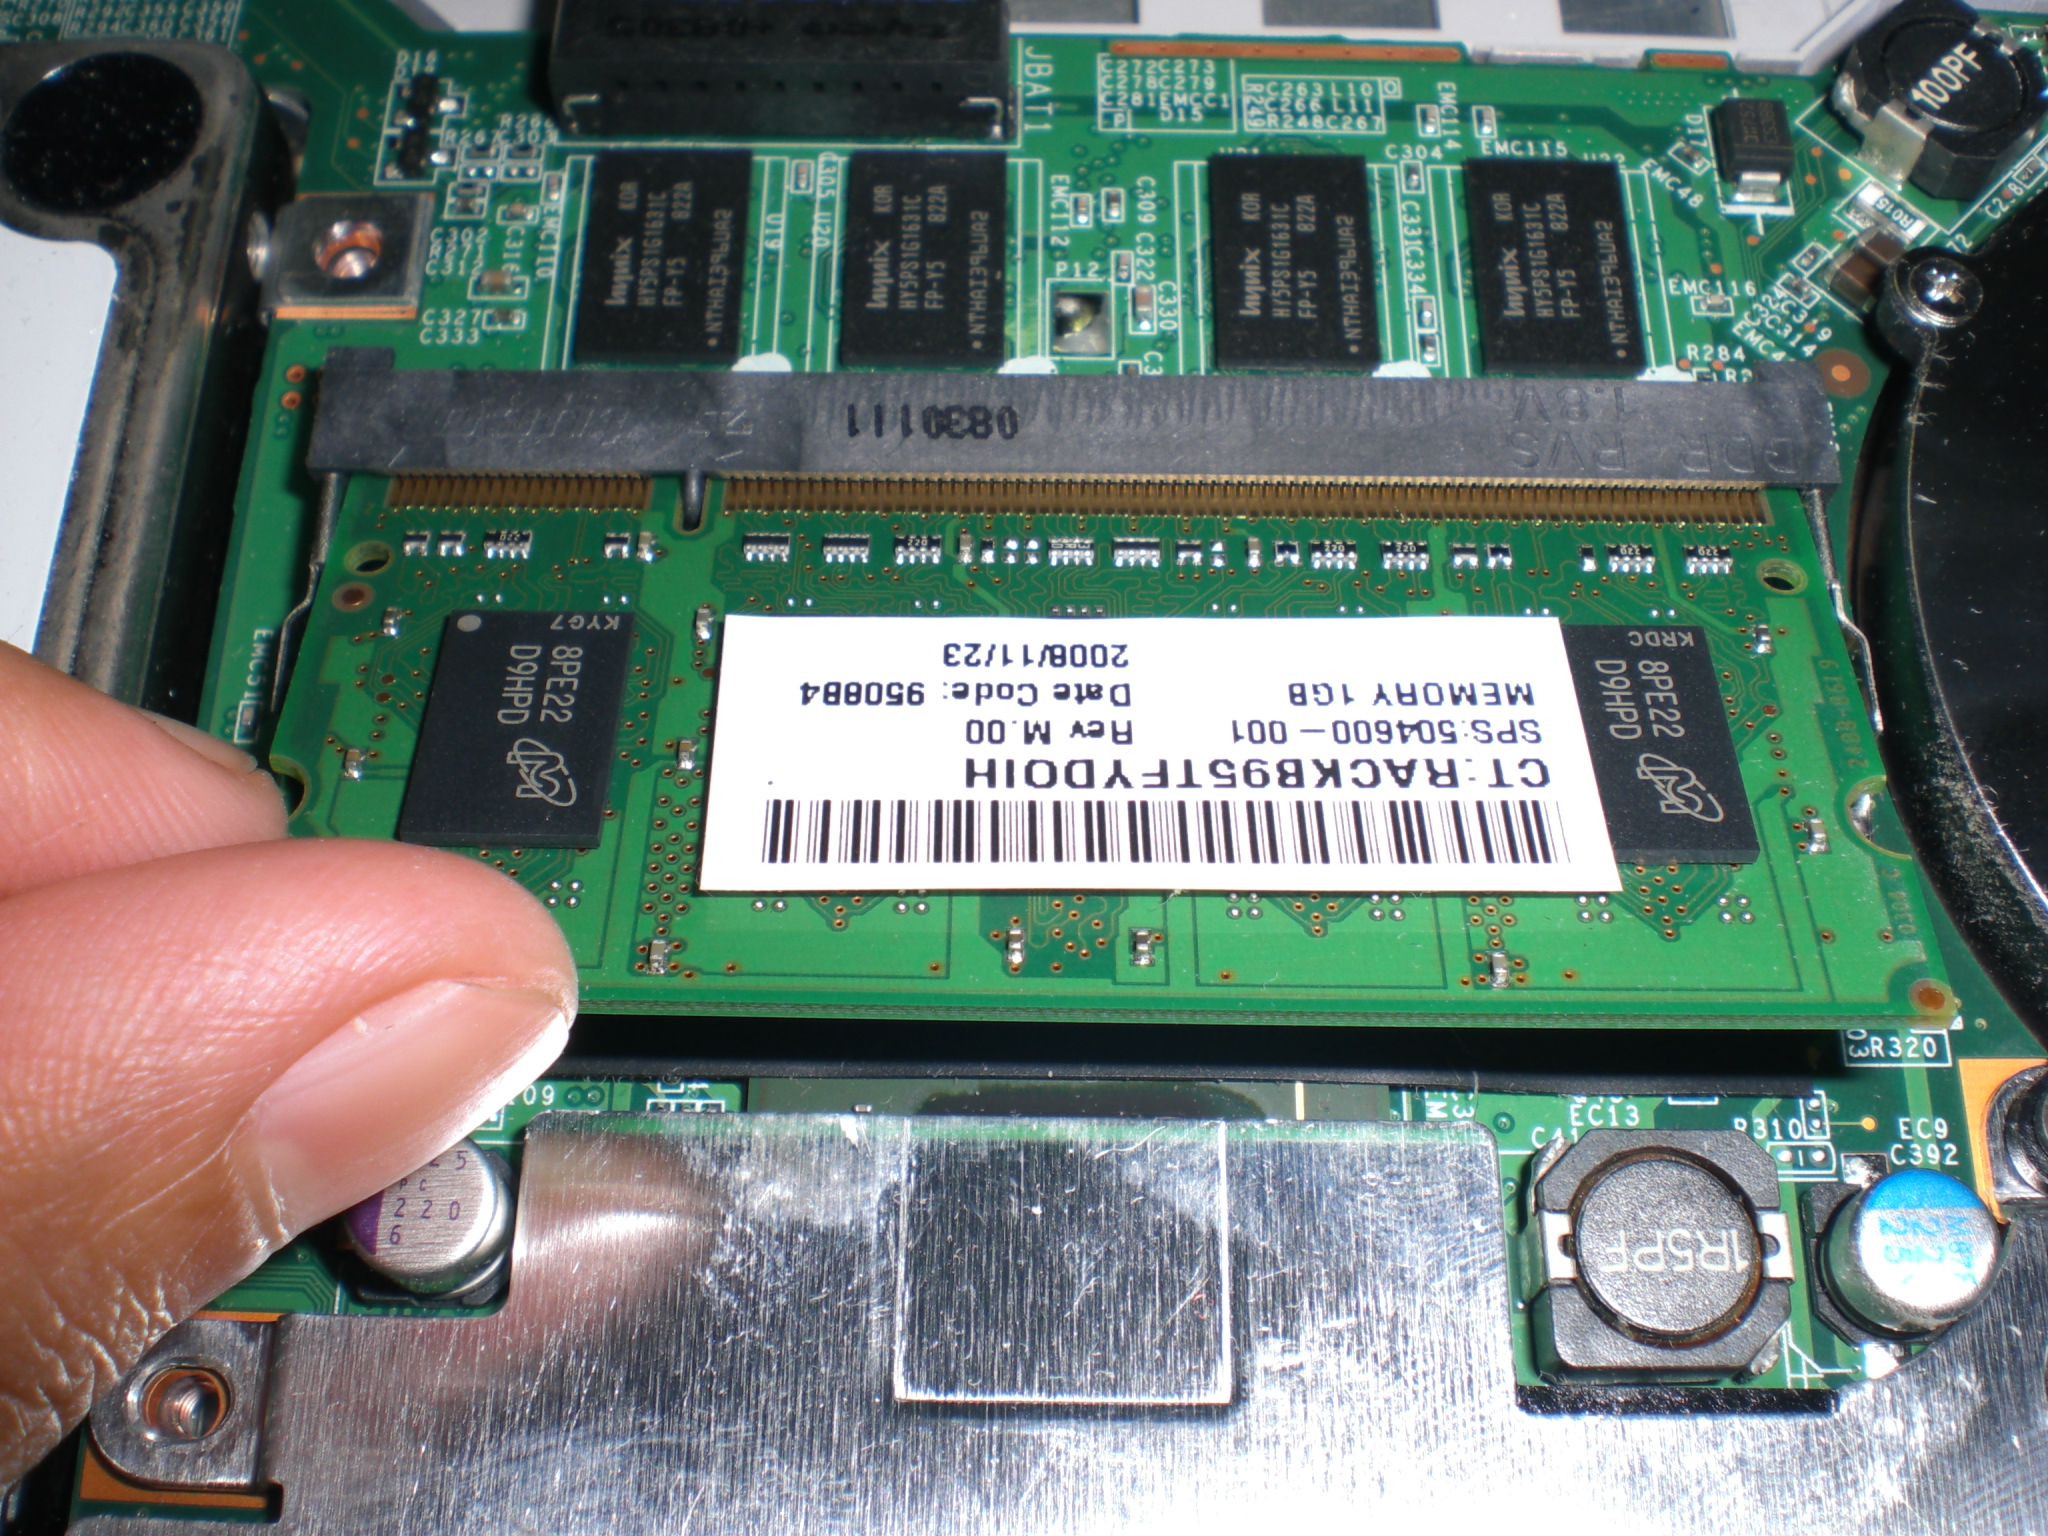
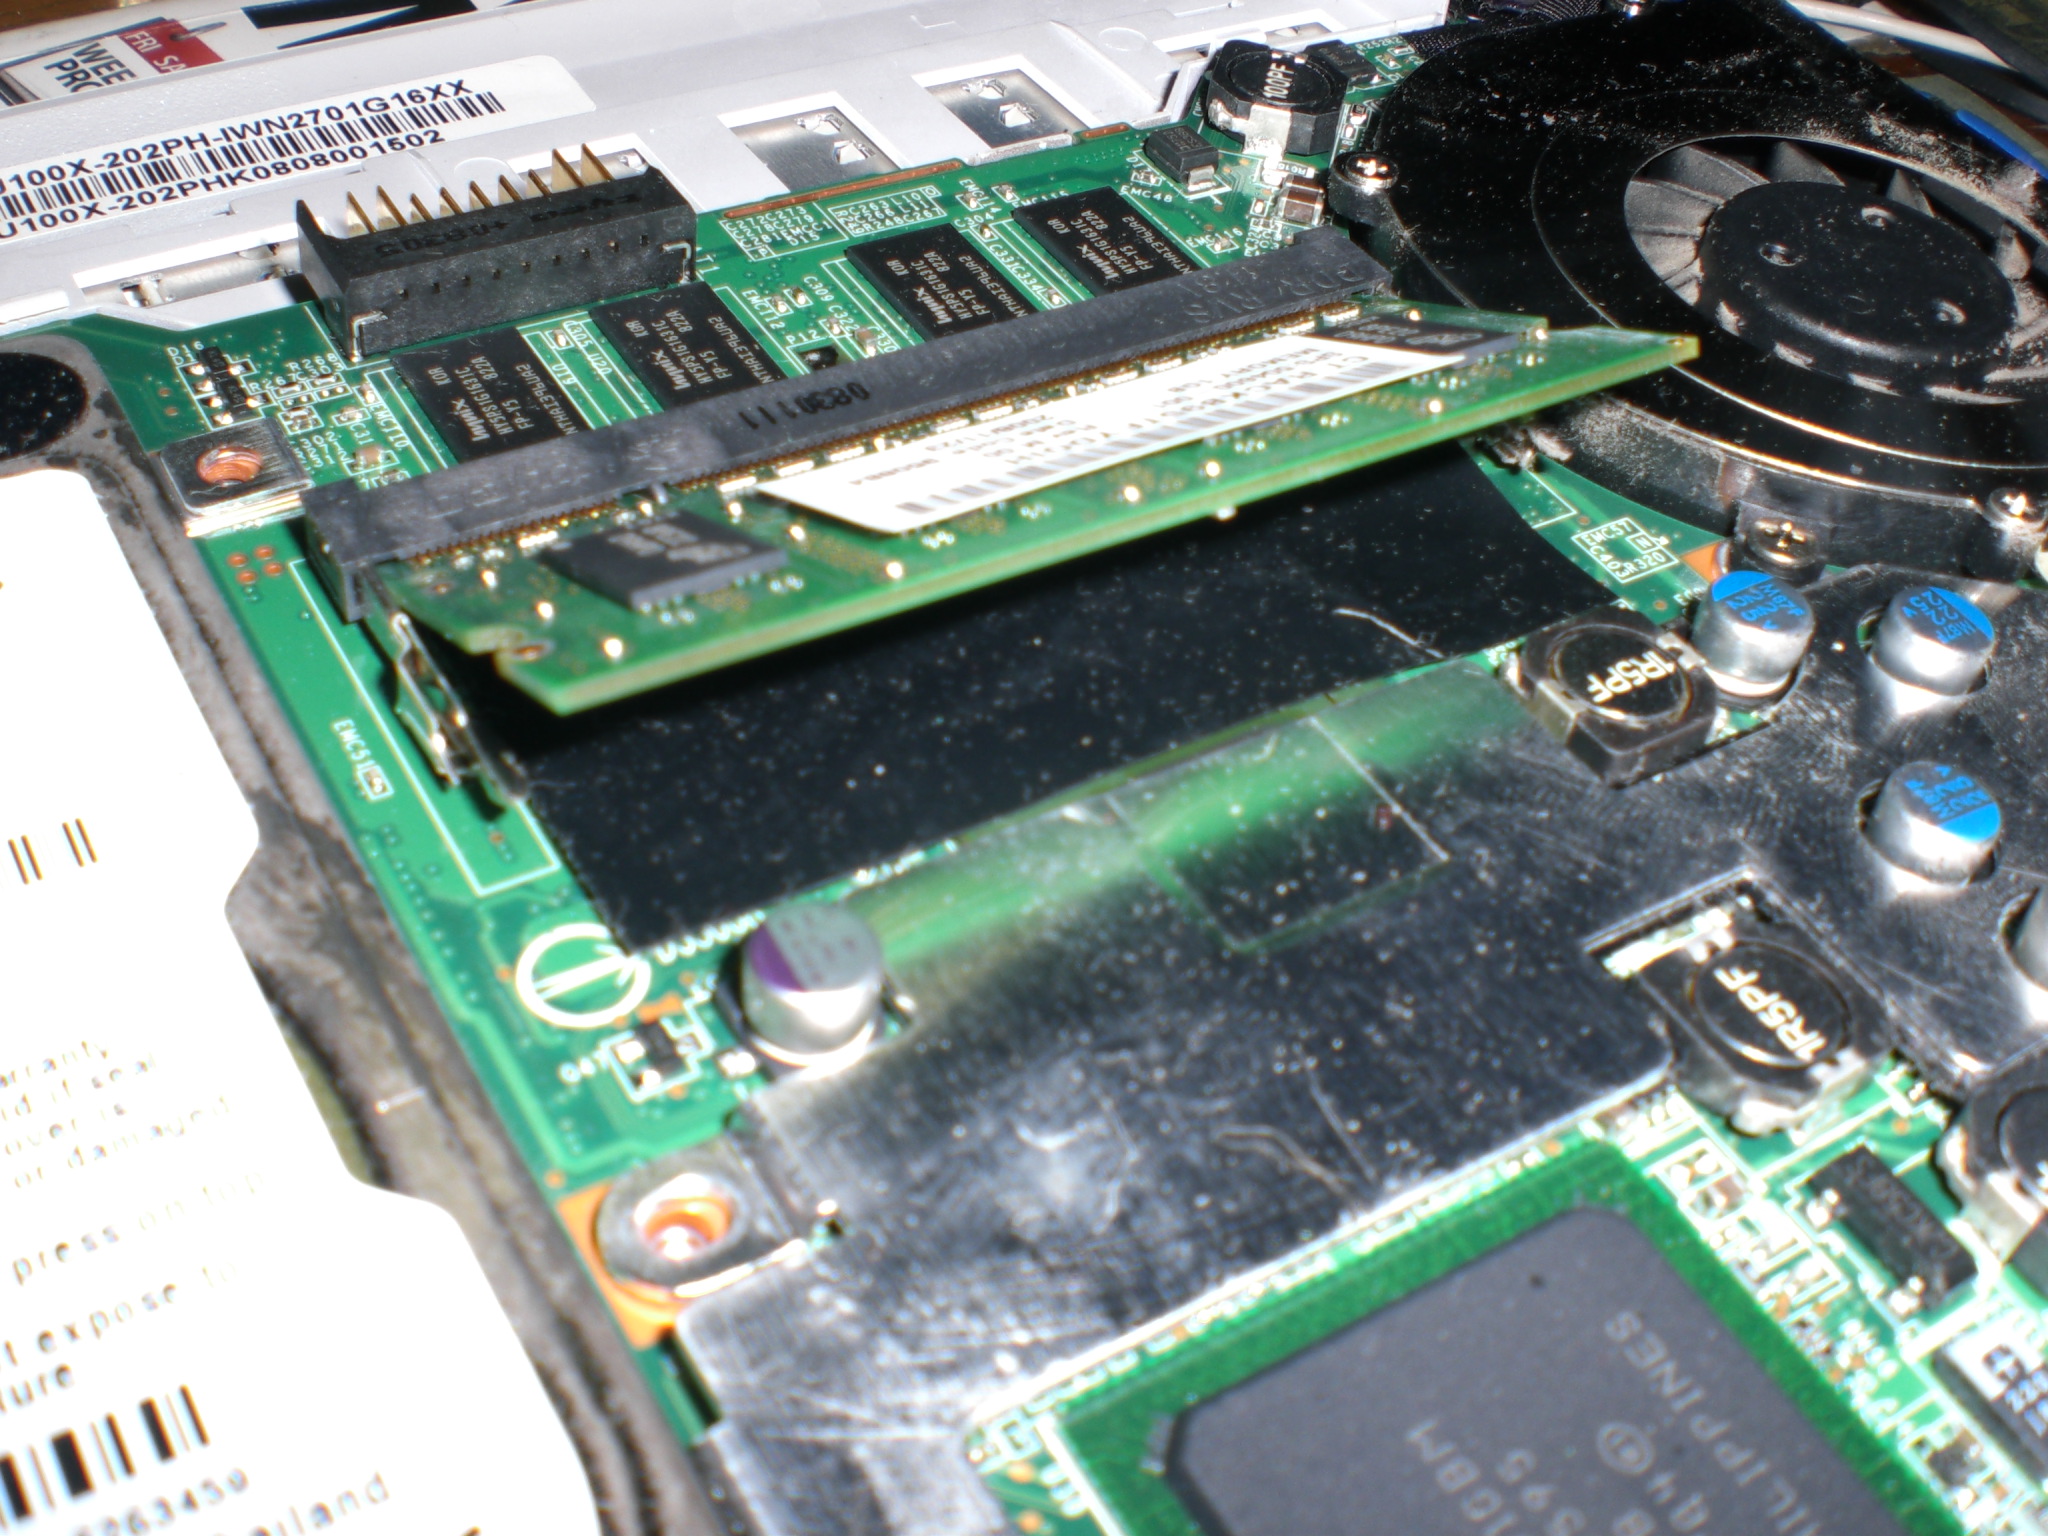
Putting in the new dimm stick was a breeze, just slide in the RAM stick at a 45 degree angle, matching the notch on the module's teeth with that of the slot. Then gently push it in and down. The two clips should be able to clasp the sides of the RAM module.

cimg1820this is the 1 GB RAM I got from the HP Mini 1000

cimg1821


cimg1822


cimg1824

I closed up the Wind and proceeded to boot up OS X. I had the fright of my life!

Trackpad and keyboard weren't working so I had to plug in my external keyboard and mouse. I tried to log in but instead of being brought to my desktop, there was just my wallpaper with a spinning beach ball (of death).

Oh no! All my files were on the Wind, my mind was already figuring out a way to retrieve them if things should get worse. 

I forced the machine to shut down and re-booted it. 

This time, I had a functioning keyboard and trackpad.

Everything's now good. I clicked on the About Mac and verified that the system recognized the additional 1 GB which gave me a total of 2 GB all in all.

Now as to why there was that little quirk, I've absolutely no idea. This is hackintosh - it's expected.

26 April 2009

VooDoo Who?

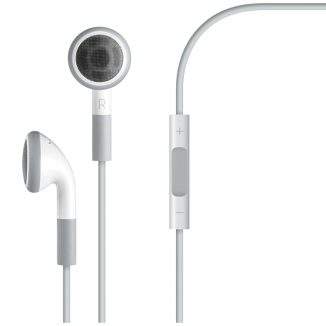
earphones1

At long last! I posted about this news on my MacBook Wind blog. I've actually been enjoying VooDooHDA for a few weeks now (hold on, maybe that's already a month?).

This is the promise to set us free from the bondage of having to use the switch.sh script which has been all but canonized in that it let us Wind Hackintoshers channel audio to our fave pair of (battered and tattered) earphones or to an external speaker for the sake of "pumping it louder"!

Okay, so before I sound like I wanted to rival the book of Revelations with this post,

1) download the VooDooHDA kext here and unpack the kexts.

2) Go to your /System/Libray/Extensions/ to delete all kexts with the text "AppleHDA" in their filenames.

3) And while you're there, delete the "Caches" folder

4) Go up one level, which brings you to /System/Library/ to delete "Extensions.mkext"

You'll be prompted to input your password in all of these deletions, by the way.

5) Launch Kext Helper b7 (or your fave kext installer app) and then install the kexts. Reboot when prompted.

If all goes well, you should be able to boot up in OS X and everything else will be as if nothing happened. The feature presentation will be when you plug in your earphones into audio jack in the Wind, sound is automatically channeled through them - sans divine intervention from the infamous "switch.sh".

Ideally, the Wind's internal mic should also work with this kext but that's not what happened in my case. Anyway, this is still in beta so we've a lot to go, but a good sign still. This same VooDooHDA kext works wonders for the HP Mini 1001TU - I can now watch my movies on my MacBook Mini! Hurray! :D

Thanks and good job to the VooDooHDA team - you guys rock!

25 April 2009

Go Pro with Quick Time

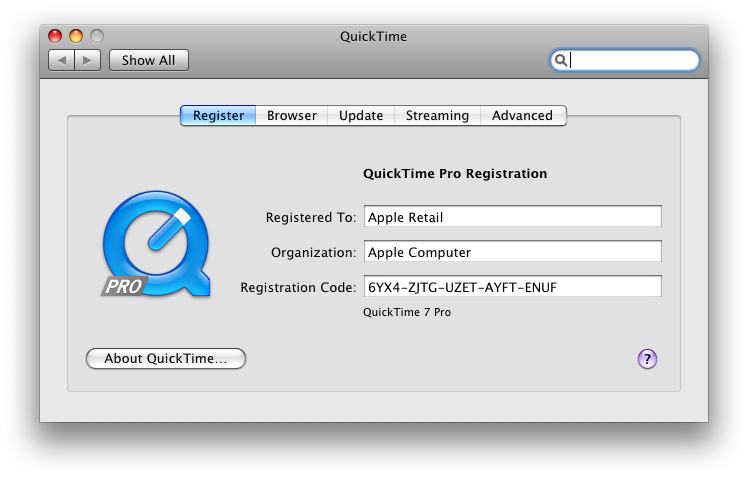
Same as my previous post before, that is how to get Quick Time Pro for Windows. This time go Pro with your Quick Time for Mac OS X.

Just see the images for details ;)


registration


pro-serial

And voilà! You're Pro:

quick-time-pro

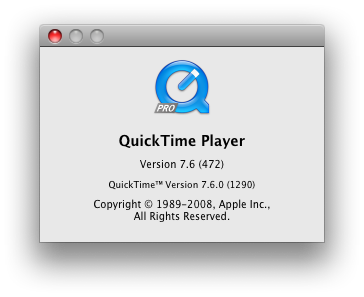
Supposedly works for 7.5 but as you can see, it also works for 7.6

11 April 2009

Old School

[caption id="attachment_342" align="aligncenter" width="500" caption="image borrowed from gadgeteer"]image borrowed from gadgeteer[/caption]

After numerous attempts at installing OS X Leopard on my HP Mini 1000 which turned out to be futile all of them; I've finally decided to give in and just do things the "old school" way. That is, I finally downloaded iDeneb v1.3 as instructed by how-to guides published over the net.

At first, I thought I'd go torrent the .iso file but the status message that Vuze, my torrent client, was disheartening me - 2 weeks to download a 4 gb or something file? Given my EQ level, I could not possibly wait that long. So I went the other way and proceeded with hunting down the 36 bits and pieces of iDeneb v1.3 on a popular file sharing site.

All in all the process took me 3 days to complete and that's not some 24-nonstop thing, mind you. Anyhow, with the downloading done and all 36 .rar files sitting in my Download folder - yes, I used my MacBook Wind to get the files off of the net - my next step was to put them all back into a single .iso that I intended to restore on my old 20 gb external hard drive. How do I do it exactly? I got RAR Expander which did the job just fabulously for me.

Now that an iDeneb v1.3 10.5.iso file was staring invitingly at me from my Documents folder, these were what I did next:

1) Mount the .iso file for iDeneb and plug in my external hard drive

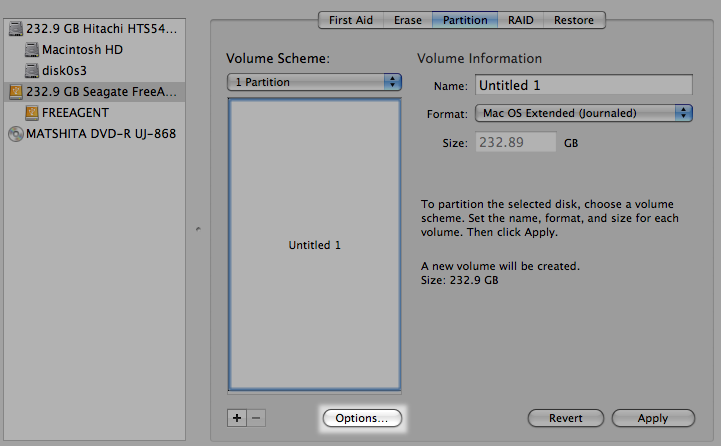
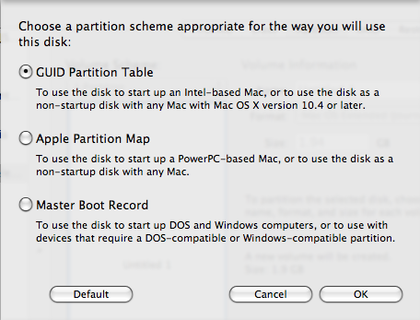
2) Launch Disk Utility and partition my external HDD using options > GUID with

Mac OS Extendend (journaled) as format.

3) In the Restore tab, choose iDeneb as the file to restore and my external HDD as drive to restore to. This will take about 15 minutes or so depending on your hard drive's speed.

This was the point I got too excited so I went ahead of myself again and tried to boot the HP Mini with the external HDD with iDeneb restored in it.

Wrong move!

The next steps are important in order to boot from the restored iDeneb HDD

4) With the restored iDeneb HDD plugged in, launch Uinstaller

5) Set drive to the restored iDeneb HDD and check option "Install EFI"

6) Click on the Install button and wait until the process completes.

This should give (at last) a bootable iDeneb installer in a hard drive.

Follow the instructions found at myhpmini.com for the actual installation of OS X Leopard on the HP Mini 1000 and all should be set.

Coming soon MacBook Mini ^^

edit: MacBook Mini blog is now up

09 April 2009

It Could Be A Happy Ending After All

dsc01078

It's been a long while since I last updated this site - been busy in the "beauty department" hence the 1 month hiatus in the "nerd land" - but I'm back.

Remember that " Try and try until you burn out" post? Well this entry's got plenty to do with that topic. I'd been attempting to install OS X on my HP Mini 1000 by going with the bootable usb, or in my case, bootable external hard drive. I'd spent many a sleepless night trying every trick under my sleeve to get past that nasty "Mac framework successfully initialized" blah blah but to no avail.

I thought maybe I was just unlucky that way or I just had to get myself a Retail OS X Leopard DVD installer or iDeneb v1.3 like what everyone on the forums were doing. And so I got a Retail OS X Leopard DVD - there was a Tiger mac that needed to be upgraded to Leopard anyway so I thought I'd use the DVD myself for this little experiment.

I began trudging on, only to find myself bumping head first on to a wall - a very hard wall at that. My DVD drive flashed me I/O errors after 35 minutes into the project. Argghhh!!

I was stuck with the old iDeneb image I had stored in my Wind's hard drive. I read through Res' instructions from insanelymac and lo and behold; I found out where I'd tripping and didn't know I was even tripping before.

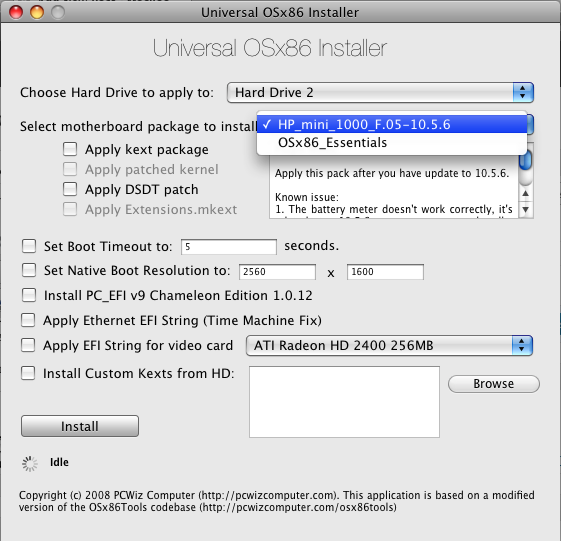
It turned out I always went directly to installing the HP mini plugin in Universal Installer, skipping OS X essentials plugin.

uinstaller-plugins

This time, I made sure I went through the OS X essentials plugin step of the how-to and low and behold: it booted.

Now my main problem is that aside from the keyboard, which I really adore of the HP Mini 1000, and a squashed 800 x 600 resolution, I didn't have anything else worth mentioning in my setup.

Does WiFi work? Although there's an Airport menulet in the menubar (now how redundant is that?), I've no way of verifying since we don't have a WiFi router at home.

Bluetooth? OS X asked for a bluetooth mouse - I plugged in my usb optical mouse but it wasn't recognized rebooting with it plugged in already caused the system to hang - but I didn't have a bluetooth mouse so I wouldn't know. Pairing with my cellphone would be pushing it, I thought.

The weirdest thing is that I'm getting an error message each time I get to the desktop.

"The system extension "name of kext" was installed improperly and cannot be used. Please try reinstalling, or contact the product's vendor for an update"

After trying to manually install the kexts; that is, replacing stuff from the /System/Library/Extensions folder and then deleting the /System/Library/Extensions/Caches folder along with the Extensions.mkext file with still the same original lame result, I'm fed up.

I'm not gonna bother trying to go further with this so I'm downloading iDeneb v1.3 now. I'm through part 8 of the entire series of .rar files. Maybe within this weekend, I'll be able to test.

Keeping my fingers crossed.

17 March 2009

Make "DVD Player" Work Without An Internal DVD Drive

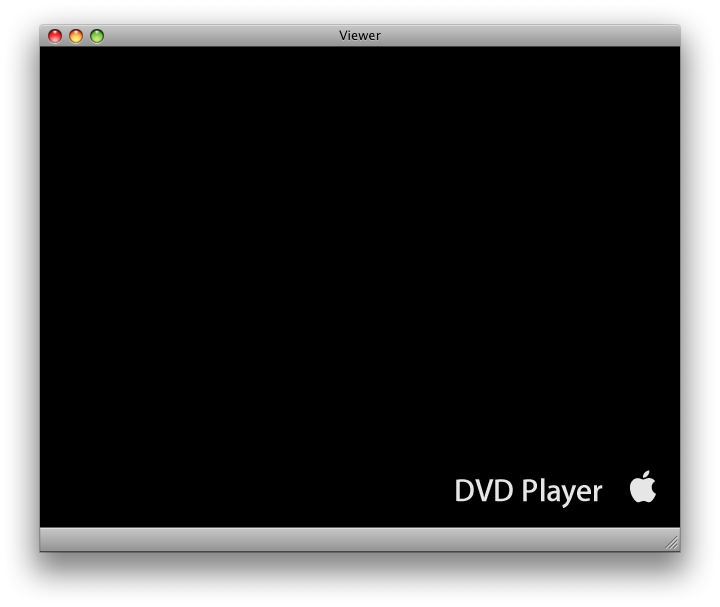
In my past post, I talked about how Apple's DVD Player would not cooperate and let me get that sought after "Apple experience" - it just keeps on churning out that error message whenever I try to launch the app.

It's like asking a guy out and getting "No" for an answer. Miserable.

Well, the guy still refuses to notice me (I refuse to accept that it's due to my physical appearance - or lack thereof) but DVD Player finally succumbed to my insistence.

Here's how:

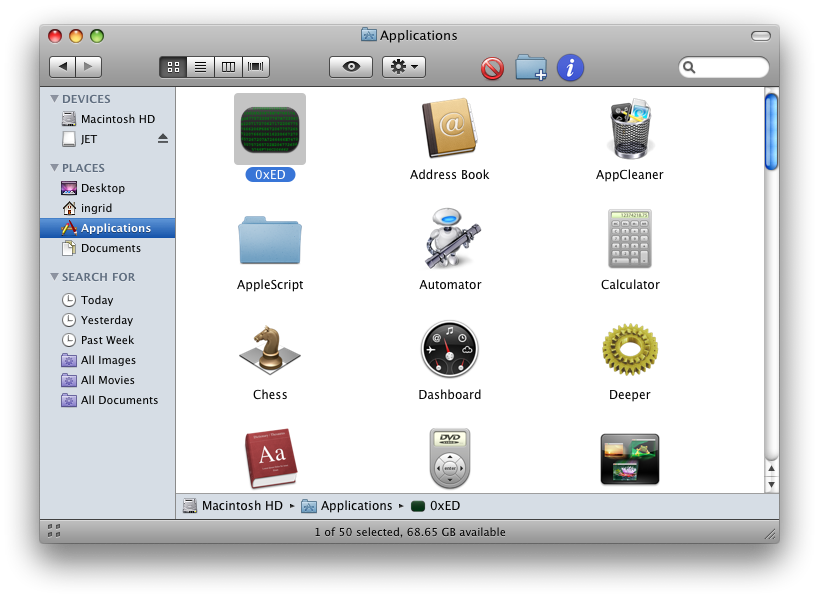
1) Download 0xED from the Apple website and then install it on your system.

2) In Finder, on the menubar, go to this directory:

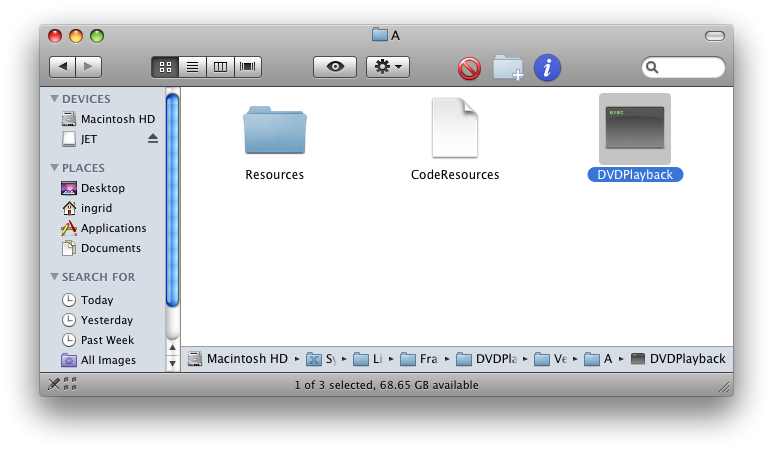
/System/Library/Frameworks/DVDPlayback.framework/Versions/A

picture-1

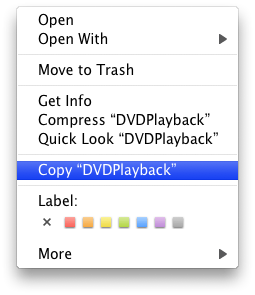
3) Copy the file "DVDPlayback" to your Desktop, for example. Then make a backup again somewhere else.

picture-3picture-4

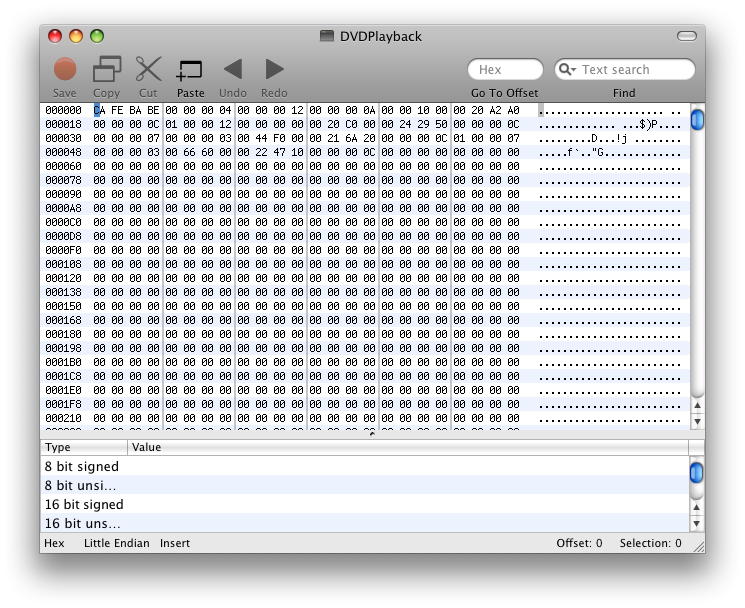
4) Open the "DVDPlayback" in 0xED.

picture-5

picture-6

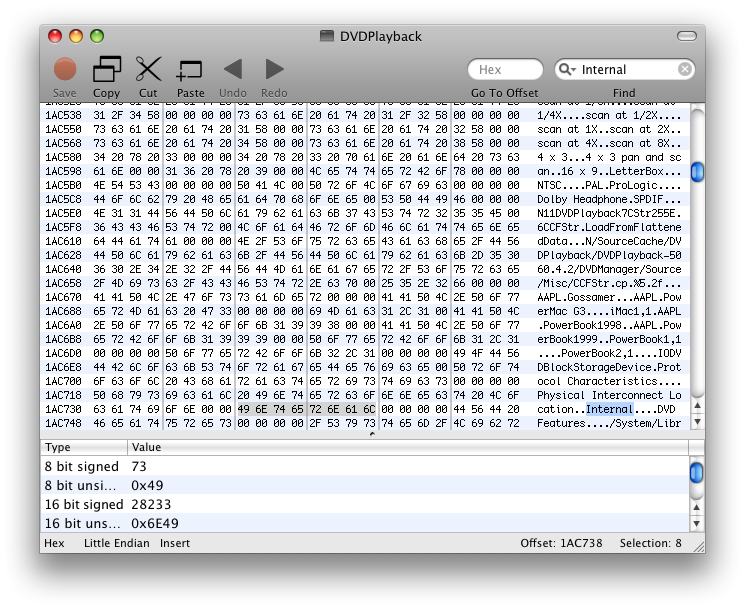
5) In 0xED, on the search field (marked by a Spotlight icon), type in the word "Internal".

picture-7

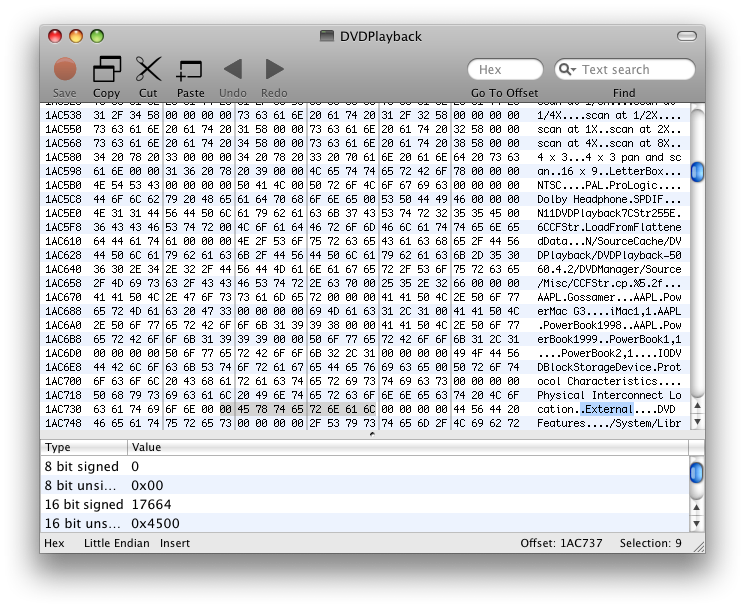
6) Hitting Enter will take you to the occurrences of this word in the file. Replace all 4 occurrences of "Internal" with the word "External". Be careful with replacing them but if you screw up, at least you've got that backup DVDPlayback file, right? ;)

picture-8

7) Save DVDPlayback and copy it back to its original location :

picture-2

/System/Library/Frameworks/DVDPlayback.framework/Versions/A

What it does basically is to tell your system to look for an external DVD drive from now and not an internal one. This is what 0xED, a hex editor, helps you to do by editing the DVDPlayback file for you without learning machine parlance.

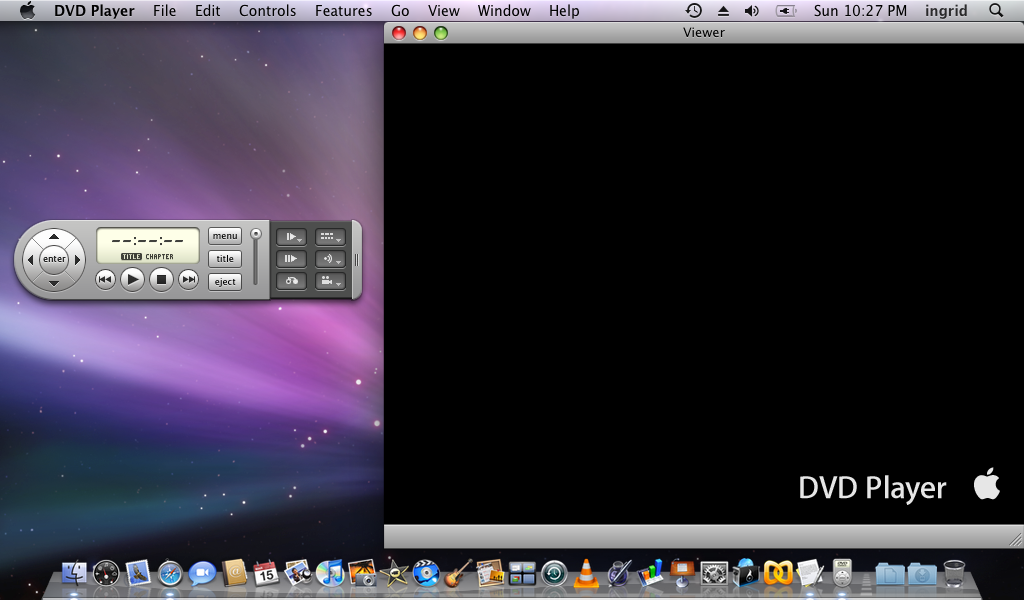
DVD Player should now start and operate fine. Just be sure your USB external DVD drive is plugged in and you're good to go.

picture-12picture-111picture-13

11 March 2009

Still No Luck - With XP, I'm Stuck

I followed Res' guide for creating a bootable HDD with OS X Leopard, sticking as closely as I could to the guide. That is; I used Universal Installer and stuff (his custom HP Mini plugin etc.). But I'm still getting kernel panics when I boot my HP Mini 1001TU off the HDD I just created.

It must be because I'm not using a Retailer DVD installer of OS X: yep, I'm still stuck with the two installer DVD's of yore. 

Seems I'm pretty much stuck with XP for now....

04 March 2009

Try and Try Until You...Burn Out

Stubborn people just never give up on getting OS X Leopard to work on their HP Mini 1000. And some stupid stubborn people just won't download the dang iDeneb v3 10.5.5 (which is the way to go according to sources) either from torrent or rapidshare or megaupload because they don't have a decent net connection that's fast enough to handle the genormous 3.5 GB or up of this DVD installer.iso file. 

So what do stupid stubborn people with only a dated msiwindosx86 and iDeneb 10.5.4 that wouldn't even boot, do?

They try and try until they succeed burn out. Which is what this one exactly stupid stubborn person did over the last weekend:

Create an OS X Leopard Installer out an external HDD.

Disclaimer: exactly stupid stubborn person, me, did not think up this brilliant idea; I got it from here.

What you need: HP Mini's bios should be F.05 for this to work according to sources.

1) A working Mac. I don't have a real Mac so I used my MacBook Wind which is currently happily running OS X 10.5.6.

2) External hard drive. I ripped off my ancient lappie's 20GB ATA (yes, ATA, not SATA) and dumped into one of those cheapo 2.5" external HDD cases.

3) Retail OS X Leopard DVD Installer. Again, I don't have this nor can I download it, so I'm left with my msiwindosx86 and iDeneb-10.5.4-I-think DVD's.

4) Universal installer from PCWiz (I'm totally digging this site!)

5) HP Mini plugin for Universal Installer. This one's from Res over yonder at insanelymac.com. This plugin should be saved in the "Universal installer/Motherboards" folder.

6) Leopard 10.5.6 combo update from the Apple website.


What to do:

1) Plug in the external HDD to the mac and then launch the app "Disk Utility".

2) Partition the external HDD as GUID partition and format Mac OS Extended (journaled). 

- In the Disk Utiliy window, at the left side, click on the external HDD's icon (usually depicted as a yellow-orange disk), 

- At the right side, you click on the tab called "Partition". (If you don't see the tab, then you're not on the "main" external HDD. Click on the first, upper most yellow-orange disk icon and at the right of your Disk Utility window should change accordingly to show the tab).

- In the drop-down menu, choose 1 Partition. Give it a name. System automatically give you "Untitled 1" by default. (Quite imaginative huh?)

formathdbootable-copy


- Click on the "Options" button. This will bring up a menu. Choose the radio button that says "GUID Partition Table". Click on OK.

guid

- Back on the main window, click on the "Apply" button. You can now close Disk Utility.

3) Insert and mount the OS X DVD installer and then launch the app "Terminal"

4) In Terminal, type this line:

cd /Volumes/Mac OS X Install DVD/System/Installation/Packages

Or, if you're using msiwindosx86 DVD:

cd /Volumes/Mac OS X Install DVD Slipstream/System/Installation/Packages

5) Hit Enter and next, type this line: 

open osinstall.mpkg

6) Hit Enter. The Mac OS X Installation program should start, showing you a window. Just choose your external HDD.

7) If you're using Retail OS X DVD Installer, skip this step. If you're using a iDeneb or any customized OS X Installer DVD, before starting the actual installation, click on the "Custom" button and uncheck Kernel patches and other stuff, like additional languages to save space and time during installation.

8) After installation is done, double click on the 10.5.6 combo update package and select the external HDD. 

9) Start Universal Installer. (You should've installed the tools/utilities on your Mac when you started this)


From Res's guide: 

*You're now in the Universal Installer window

1) Change HD to your USB device. 

2) Select motherboard package with X86_Essentials and select apply kext package then click install. 

3) Select motherboard package with HP_mini_1000_F.05-10.5.6. 

4) Select apply kext package and DSDT patch. 

5) select ethernet EFI string and EFI string for video card (intel GMA 950). 

6) Click install. 

7) Select PC-EFI V9 then click install again. (In order to reduce the possibility that PC-EFI could be installed not correctly. I prefer to install it separately.)

8) Launch DiskUtility and fix the permission of your USB device. Done. 

9) Now, congratulation, you have made a bootable USB device. Reboot your computer with F9 and select your USB device as boot disk then boot with "-v -f". Now you are able to boot into your OSX on your USB device.

What I did after my Step #8 because I wasn't able to download Universal Installer and Res' HP Mini plugin for Universal Installer.

1) Launch OSX86 Tools Utility. Get it from PCWiz Computer site.

2) Click on "Intall EFI/Run FDISK" button. It'll ask you some questions (I, in particular, don't understand what they're talking really about) so just OK it and type your password when it asks you so.

3) A new smaller window will come up. In it, click on the "Run script" button. Again, just type your password and hit Enter to confirm if you're asked to.

4) Terminal will open. Confirming what you're about to do. Just hit Enter or "y" then Enter. It will present you with a list of actions to do. Choose 4 (Chameleon EFI) and press Enter.

5) It'll take a couple of seconds then you'll see a list of drives in your system. Usually, the external HDD will be listed as disk1. So just type "1" and hit Enter.

6) You'll see some texts running in the Terminal window and then a confirmation that you're done. Close Terminal and you should now have a bootable external HDD with OS X in it.

But since I didn't exactly follow Res' guide, especially the part with the Universal Installer and HP Mini plugin involved, I did not succeed at all and got stuck at the exact line I was dreading.

"MAC framework successfully initialized using 5242 buffer headers and 4096 cluster IO buffer headers."

Bleh. Well, at least I still have one more straw at this by downloading the Universal Installer and Res' HP Mini plugin before I quit being stupid and stubborn and just get iDeneb 10.5.5.

26 February 2009

Hackintoshing Woes

wallpaper_5_1920

Ok. So, like my love life that's now officially vamoosed -- dead, I may have been severely over optimistic about the whole thing. But hey, I was able to put OS X on my roomie's Asus 1000H with nothing but my (previously) trusty msiwindosx86 DVD installer! I mean, it's just gotta work somehow - as sure as the sun rises every morning, being able to install Leopard with the msiwindosx86 DVD is inevitable. And perhaps even more than that, I believed it to be a fact.

Alright, so that wasn't exactly as easy as that --I did have to scourge the net for some clue until I stumbled upon the custom made bios from osrom.net -- but the main point is that I did it and as proof of that success, my roomie's perched on her bed right at this moment, transferring some songs off her "Eeepple-complete-with-Apple-sticker" to her still-virgin-never-been-jailbroken iPod Touch.

She's using the world's most advanced and most coveted (at least in my own opinion) OS in the whole face of this earth - on a black Asus 1000H!

And so now, the question is: Why am I staring into Windows Vista Home Premium? And my touchpad has gone berserk for the Nth time so I've to reboot for the Nth time again because of crappy driver support?

The Sentellic touchpad on my MSI Wind, I admit, feels as if it chugged down 10 venti Americana from Starbs but at least its "jerkiness" (as in literal jerky movement - erratic) after waking up from sleep goes off eventually and I hardly even notice it.

I've failed after many many heart breaking attempts at putting my beloved Leopard on my HP Mini 1001TU. I only get this pitiful and not to mention cryptic, line:

"MAC framework successfully initialized using 5242 buffer headers and 4096 cluster IO buffer headers"

Kind of reminds of what a someone said in the movie "He's Just Not That Into You", that when guys dump girls, they try to deceive them with "I don't deserve you, baby". It sounds nice, but really, it just means he's dumping you.

Sugar-coating. Oh crap.

20 February 2009

I've a New Toy!

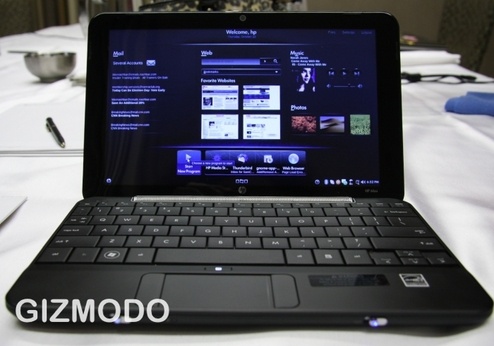
Ladies and gents, please welcome, the HP Mini 1000! Err, actually, the HP Mini 1001TU or so says the label on the box along with the part/product no. and the serial no.

I'll play around with this little drop dead gorgeous baby for a while with its stock Win XP Home and then I'm proudly off the races to OS X-ify it - bring it on!

hp-mini-1001tu

19 February 2009

Quick Time Pro - Google And Ye Shall Find

Did you want to save those nifty Apple how-to movies for watching later when you're offline or just for reference?

I did too. In fact, I even checked out the iTunes store to see if they were available for download as podcasts like the Apple Quick Tips. No luck with that. 

Then I tried sneaking off to IE's temporary internet files folder under my user's account in Document and Settings -- yep, I'm doing this at the office PC. That tactic didn't prove fruitful either.

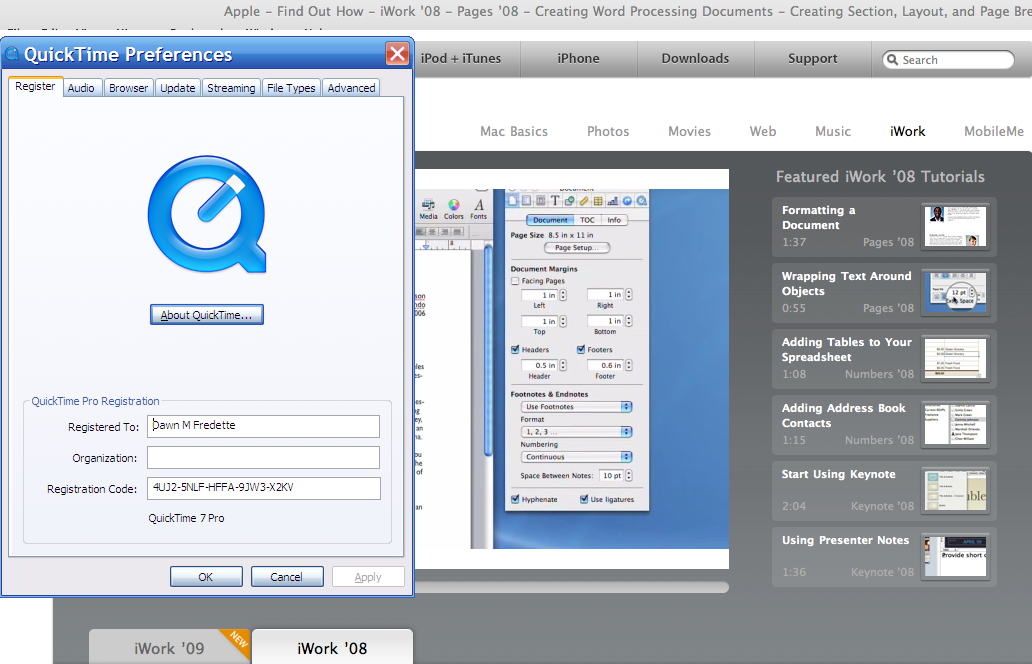
Hmmm. It seems that the only option left is to go Pro with Quick Time. But I didn't wanna shell out just to get videos that, I believe, are meant for the public anyway - we're talking about Apple how-to movies  here, so I just followed the old saying "Knock, and it shall be opened to you", albeit in its new incarnation: "Google, and ye shall find"

qt-pro

Dawn M Fredette

4UJ2-5NLF-HFFA-9JW3-X2KV

18 February 2009

Netbook Addict, Reveal Thy Self!

494x_hp_mini_1000_0002_01

Like all yuppies I have a pressing need to stash up for the rainy days (i.e. when the company decides to chuck me for good due to the worsening economy). However, I think I've been exposed to a viral epidemic that is the netbook craze -- started by Asus of course with their Eee PC 701. And so here I am, aware of the impeding danger yet unable to fully grasp it, the truth held at arms length is visible yet remains unfelt.

Against the odds, I'm getting a new netbook tomorrow. If all goes well; if I'm pleased with the pre-owned unit from the seller, I'll be starting a new blog.

Guess what: it's gonna be named "MacBook mini"

And yep, that's because I'm gonna put OS X Leopard on it! ;)

15 February 2009

Linux and Mac OS X

Last week, I decided to take a leave from work and, yup, I tinkered with my netbook. I tried to experiment with external monitors and graphics drivers just for kicks. I felt like it so I did it.

I was following a thread over at the msiwind.net forums and although I knew there was some issue with enabling mirroring mode, guess what? I still tried it.

Both displays conked out as soon as I enabled mirroring, I was seeing bars of shades of black and grey and then à la rainbow bright colors. In the end, I couldn't get past the blue screen even with the external monitor already disconnected. I tried what the forumers advised, removing some com.apple.windowserver.plist and so on files, but that still didn't solve my prob. 

So given the noob that I am, equipped with just guts and even lesser actual tech know-how,  I thought I'd reinstall. But my precious hackintosh files were still in the drive and I didn't have back up for them yet -- I was meaning to do it after the external monitor experiement but this tragedy happened. 

An idea struck me and so I took out my msiwindosx86 installation DVD, plugged in my iPod, booted from the DVD as if I were reinstalling. 

I was hanging all hopes on this one tactic: archive the files which were contained in a folder on my user's desktop to my main(root) /. And the copy the resulting archive to my iPod before I wiped out, once again for the Nth time, the entire content of the fairly used (and to some extent, abused) 160 GB WD SATA hard drive that came with the Wind.

Once I was in the installer window, I fired up Utilities > Terminal. 

Here is when I swish out my battered copy of Complete Linux. Ok, so what's Linux doing in this blog about Mac OS X? Well, it seems that knowledge of Linux commands is valuable if you wanna really get to know Mac OS X. Hey, OS X is Unix beneath the polished and posh Aqua interface and Linux is "Unix-like".

So here are the steps:

1) In the terminal :
    tar cvf -f /Volumes/Macintosh HD/hackintosh.tar /Volumes/Macintosh HD/Users/username/Desktop/Hackintosh Resource

    the -f is the flag for indicating that you want what's happening during the archive process to display in terminal.

2) Next:

    cp /Volumes/hackintosh.tar /Volumes/iPod's name/

The drive's LED indicator will be blinking a lot and then completely stop and you're back at $ prompt.


Copying has been done successfully.


I wiped out my hard drive and did a fresh install and when I mounted my iPod to get to my files, all I had to do was unpack the hackintosh.tar to a location on my new Documents folder and voilà!

11 February 2009

Unleash Your Widgets

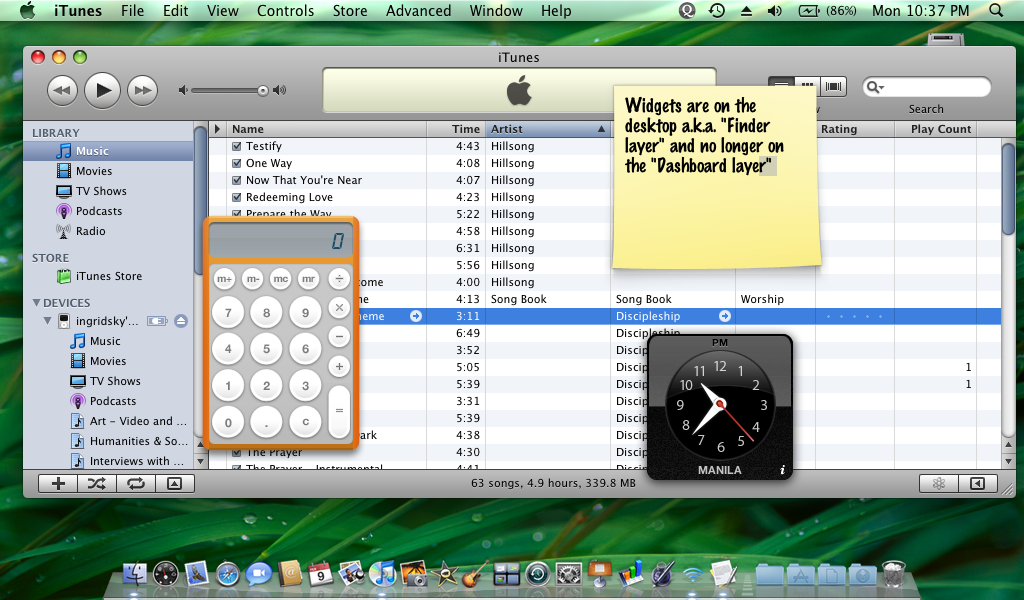
I don't like Calculator's looks. Not that it's ugly, the calc widget just looks better. But you're not able to access it in your desktop because its being held prisoner by Dashboard's "layer". When you're in Dashboard, the Desktop is dimmed and you'll have to leave the layer before you can get back to what you were working on. 

Now of course you've heard about tweaks, some as simple as downloading an app and some requiring mucking around in Terminal. But one solution I've recently discovered; Deeper

What's so nice about Deeper is that it's developed by the same people who brought us Onyx and that it provides tweaking options not just for this specific issue but tons of others as well. This isn't saying that what the other options do is mediocre or isn't as effective; it just saves you from the trouble of installing separate different apps for the different tweaks you wanna do. 

You can access a lot of settings for OS X that you didn't know was possible or thought was available exclusively via Terminal (command lines, yuuuuckh!) and this through a UI that's beautifully integrated with Leopard-ish looks for the meticulous purists.

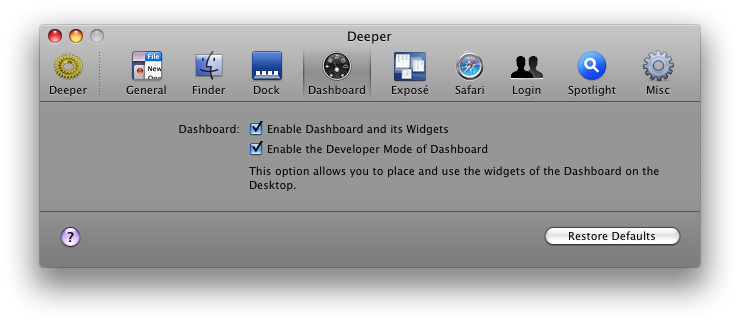
To free your widgets, just check the box for "Enable the Developer Mode of Dashboard"

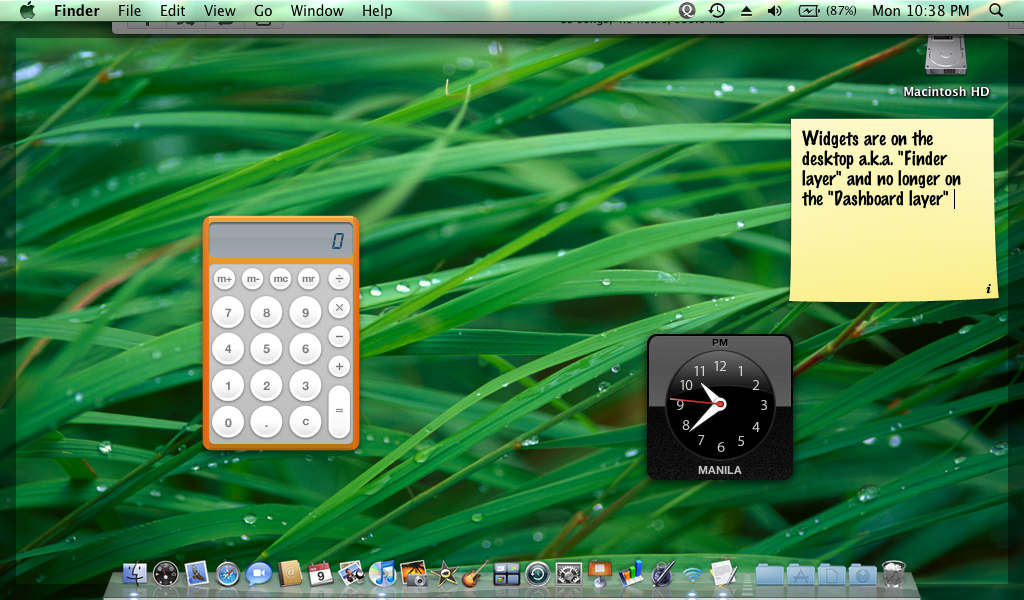
deeperTo get a widget crossover to your desktop "layer", you gotta rescue it first from Dashboard by hitting F12, choose your desired widget, and then, while still dragging the widget, press on F12 again and voilà! 
widget-independence-day

Now, the process of liberating widgets may not be as clearly defined as I would want it to be but you'll get a hang of it once you try it yourself.

And the widgets, by the way, are not affected by Exposé nor Spaces, in that they stay at the exact same spot whether you press F9 (they don't get shooed to some less conspicuous position on the screen) or switch space (the widgets simply follow your lead).

Here, I tried clear up my Desktop but the widgets did not budge a milimeter. (I deliberately moved the sticky notes widget to cover something I don't want to be captured in this screenshot)

expose-not-widgets

MSI Wind Users Are Hackintoshers?

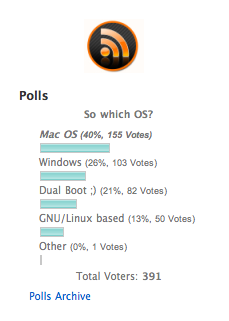
I voted in a poll over at msiwind.net for OS -- I assume, by OS, they mean the OS you're running on your Wind and here's an interesting discovery:

msiwind-hackintoshers

Mac OS X is finally getting ahead of Windows -- well, in this kind of game, at least.

10 February 2009

MobileMe

Maybe I should already get me a real Mac. But I can't, don't have enough cash on me to pay for one, even on 0% installment basis (my S.I.P doesn't allow me that amount). Now with the looming probability - yep, not just possibility - of me joining the pool or poor Cunem-yuppie's (Currently Unemployed Young Profesionals), I'm in no ready state to be swiping that credit card any time within this decade or so. In short, no real MacBook for me.

But that doesn't prevent me from pretending to be a true blue Apple fangirl and my latest achievement is: TADA! My own MobileMe account courtesy of the free trial offer by yours sincerely, Apple Inc. One Infinity Loop, Cupertino, CA.

Now I have my own "@me.com" account! Isn't that grand?

Well the only reason I risked my credit card number (you need to input a bonafide credit card number to sign up even for the free trial) is to be able to use iChat. The prereq is a .mac account which has been superceded by MobileMe nowadays so I took the plunge. It is well stipulated that I'd only be billed once my 60-day trial period has expired and that I can just deactivate my account if I didn't want to pay 148 SGD or around PhP 5,000. It's true that by deactivating my MobileMe account, I won't be able to use the mail and the storage space but I'd still have an iChat ID. So far, so good.

Edit:

I was totally wrong (and stupid) to actually assume that a MobileMe account and a .Mac account are the same and one! Geesh! I'm getting an AIM screen name to use iChat. Although, I must admit, the MobileMe experiment rocked! :D

And what do I do with all that trial space up in Apple cloud? Hmmm....

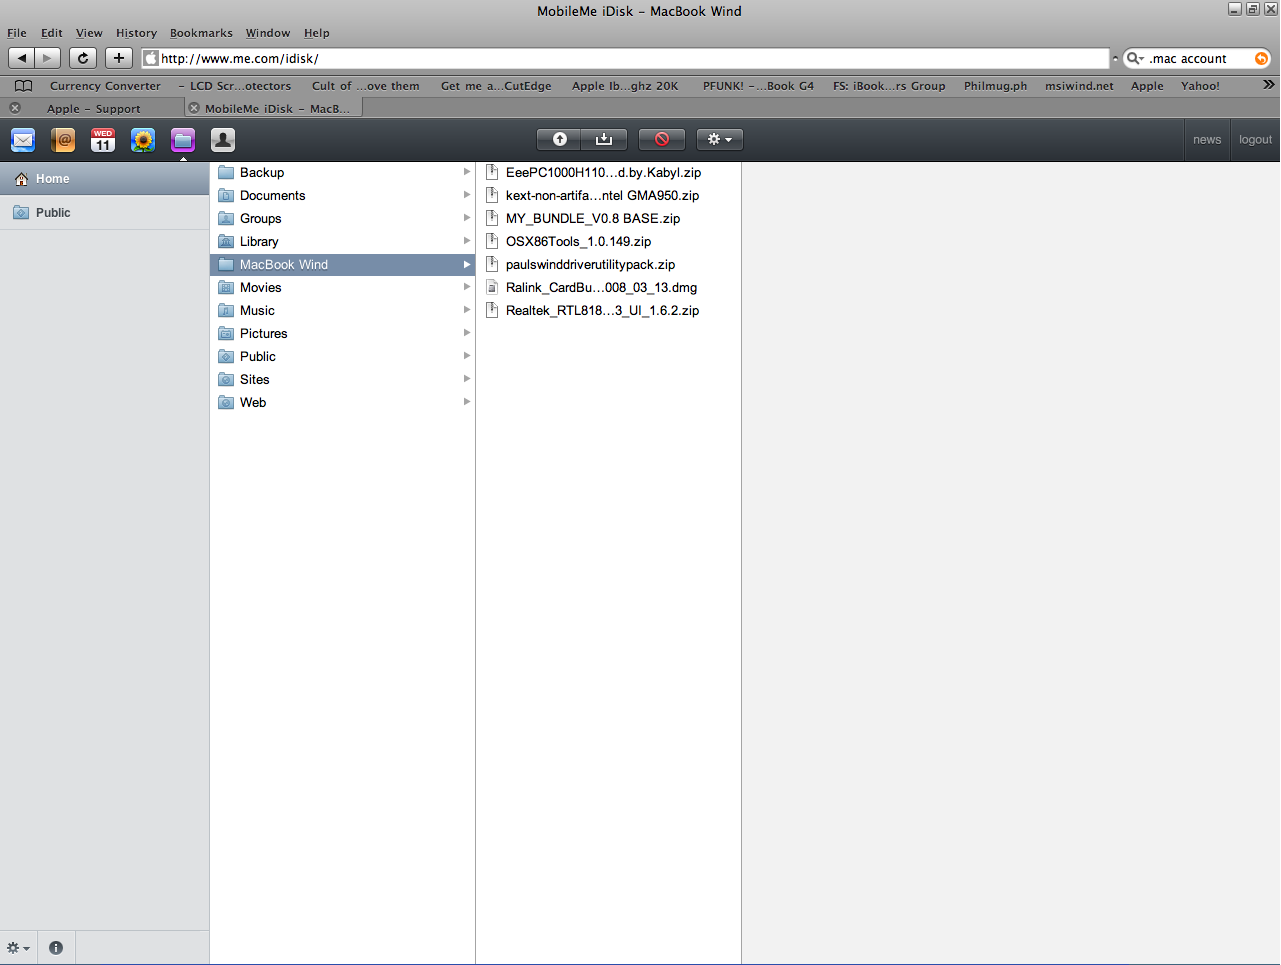
mobileme

Yep. I'm storing my hackintosh files. Kinky ! ;)

Mactracker Thinks MSI Wind Is A MacBook Air

And the charade goes on; me, being the Mac/Apple fan girl wannabe, downloaded Mactracker. I even downloaded two versions: one for my MacBook Wind (oh, don't I love saying that name!) and one for my Windows office PC. 

Mactracker is great application for learning about Macs. It's sort of a Mac history book if you will, offering information on the different Mac models that ever graced the surface of this earth ever since Steve Jobs, then in his early 20's, took out the first Macintosh from its bag and let it stay "hi" to the audience.

It even plays for you the Start Up and Death chimes of the different models. Cool.

My MacBook Wind has chosen to be very taciturn especially during start up and it's only because of Mactracker that I ever knew what it sounds like when just woken up.

Anyhow, of all the reasons why I think this is important to blog, this picture below is the catalyst of it all:
ping-mactracker
It thinks that my MacBook Wind, which is a mere hackintosh, is an Air! Ooooh... Not bad, not bad.

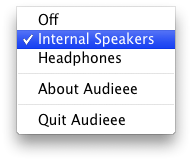
Audieee

audieee

Argh!!!

Why didn't I see this one first? I hate Quick Silver and I hate it still! I thought I had to marry the guy and so I did and had little non-descript scripts such as "HeadPhones" and "switch.sh" litter my Macintosh HD, thinking all the while that this was necessary!

But it turns out that I could've opted for Audieee on my wind as well :(

And I wouldn't have had to go through the longish process of setting up what I had now had I unearthed the thread sooner.

It turns out that all I needed in the first place was the Audieee version customized for the MSI Wind (it was originally it was meant for the Eee PC hence the 3 e's in the utility's name) and CHUD.

And two steps at that:
1) Download CHUD and audieee4wind
2) Install CHUD and audieee4wind. Forget about the switch.sh included in the package

Great....

09 February 2009

Headphone Dilemma

Color me prejudiced. Apparently Quick Silver is a shining beacon -- or better yet, the shining beacon -- in the world of Mac users / geeks. Perhaps my being only a Hackintosh user / geek is reason for the lack of that certain X factor determinant of the aforementioned species. Or perhaps having another "Menulet" crowd my menubar is just purely disgusting to me. 

But for what its worth, I've to get used to Quick Silver cause it's what I'm gonna live with from now on if I want to be able to use headphones on my MacBook Wind.

You see, on the MSI Wind, the headphone jack is one of the things that don't play well with OS X. But the good news is that people obviously smarter than me (and thank God they are) have come up with this great workaround involving a script called "switch.sh".

You run the script to switch audio channel from speakers to headphones and vice versa. In a nutshell, it does the duty that plugging in or unplugging your pair of earbuds should accomplish automatically.

Normally this could be done via terminal but that would entail typing command lines which yours truly is bound to forget and which is an error prone process altogether. There's an option where you create the script as an app and then you give it a nice icon and then you run it every time you wanna switch. The problem is, the app actually sits in your dock. Not that I mind it taking space in there; I've already learned to live with the nuisance that is the Realtek WLAN Utility but that I'd had to click it as well. I prefer a keyboard shortcut -- for some reason my brain remembers those, probably from muscle memory mostly.

And guess what, Quick Silver makes it possible to do just that. Oh well, if this were an arranged marriage, I guess I'd have to play my part until the AppleHDA / VooDoo team at the msiwind.net forums releases the much awaited fix that would let us, avid MSI Wind hackintoshers, use the headphones in the usual no-script-just-plug-and-unplug way and also the internal mic.

Here's the guide (taken from msiwind.net forums) :

1) Download this package which contains the switch.sh script and CHUD, and download Quick Silver here
2) Unzip the package anywhere you want. Me, I saved it in my Downloads folder first.
3) Install CHUD and install Quick Silver.
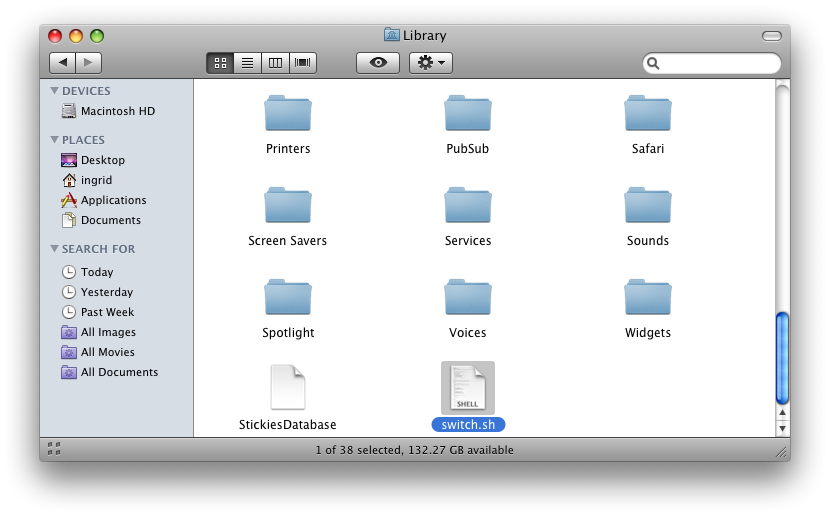
4) Save the switch.sh script in /Users/your username/Library.
users-library-switch
5) Launch Terminal and type this command lines:
    cd Library
    chmod 755 switch.sh

6) After exiting Terminal, launch Script Editor - it's in the AppleScript sub-folder in your Applications folder - but I just command + spacebar and start the app via Spotlight (which is easier in my opinion).
7) Type this:
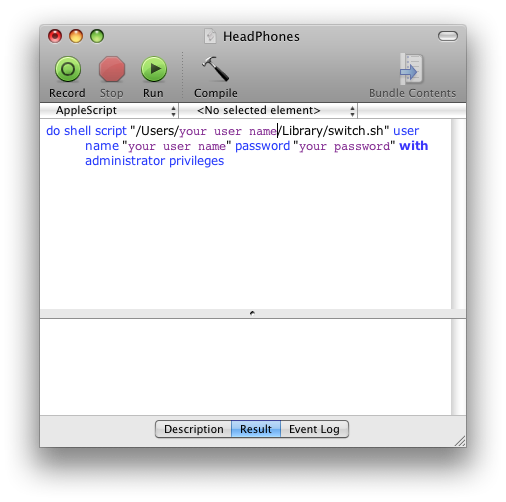
    do shell script "Users/your username/Library/switch.sh" user name "your username" password "your password" with administrator privileges

It should look like something like this:

headphone-script

8) Hit the Compile button -- the one with the Hammer then go to the menubar: File > Save as and name your script. I followed what the original guide author did and named mine "HeadPhones". Put it in the "main" or "root" /Library/Scripts folder like so;
machd-lib-scripts-head-phones
9) Launch Quick Silver
10) Now here is when I get too lazy to write so you follow the photo story:
picture-1

You can just drag n' drop the actual script file in the box in Quick Silver


picture-2

Click on the small (microscopic) gear icon to the right to access the drop menu from you select "Triggers"


picture-3

Customize your trigger key by clicking on the line under "Trigger" column.


picture-4Click on Edit and the field should flash.
From thence you can type the key trigger combination you want. I made mine "alt + S" ("S" for switch :D)

Make sure that Quick Silver is launched at login. You can do this in Quick Silver: Preferences > check "Start at login" > uncheck: Warn before, Enable advanced, Show icon in dock, and Show icon in menu bar.

You can remove it in your dock by hold clicking on the app icon and then click on "Remove from Dock".

And from then on, you can happily just hit alt + S (or whatever your trigger is) to toggle from internal speakers in earphones :D